Home Blog Page 11

What You Need to Know About Shower Diverters

0
what you need to know about shower diverters

Shower diverters are a must have when combining your bath and shower together. There are 3 types of diverters available and it is often an oversight for many new-to-the-scene renovators as they don’t purchase this valve for rough in. It’s important to ensure the tapware chosen suits the bath and shower configuration. This post will hopefully explain what you need to know about shower diverters.

What is a Shower Diverter?

A shower diverter is a valve that directs the water to the bath spout or shower rose, depending on which is to be used at the one time.

There are three types of shower diverter valves. You can get a push button diverter which sits near the handle of the shower, a ceramic cartridge diverter which is also installed next to the shower handle and a spout diverter, where the diverter button is on the bath spout.

push pull button shower diverters
Push Pull Button Diverter – at our accommodation in New Zealand
ceramic disc shower diverters
Ceramic Cartridge Shower Diverter Meir Australia
bath spout shower diverter Methven
Bath Spout Shower Diverter Methven

Each diverter functions in a similar way – if you push/pull or turn the lever, water will be directed to the orifice it needs to go through.

The most common diverter is the push pull button diverter. It’s quite common to see these diverters in overseas hotels.

what you need to know about shower diverters

But they can be frustrating and fiddly to get the water to come out when you want it to. I’ve experienced the surprise of a cold shower when I’ve wanted the water to fill the bath for the kids. And sometimes the diverter can jam causing no diversion whatsoever. Unfortunately, they do have a limited time span.

ceramic disc shower diverter
Image by Meir Australia

The benefit of a ceramic cartridge shower diverter ensures a smoother transition by turning the handle. It’s much more user friendly and is a stylish option for your bath and shower combo.

matte black shower diverter

All combined bath and shower configurations need a diverter. Your choice on diverter can depend on the tapware you choose, the finish, look and functionality.

What shower diverters have you used in the past? Do you have a shower diverter in your bathroom?

I put my Christmas Tree up in November and I’ve got no Regrets

0
christmas tree up in November

We’ve gone against tradition and have had our Christmas Tree up for over week now. And I have no regrets putting our Christmas Tree up in November.

christmas tree up in Novemeber

With the way the years, months and days seem to fly by, I want to get as much enjoyment out of the tree as possible. December will most likely be gone in a blink if this year is anything to go by.

It’s also served me well for Christmas content ready to be published this month, and shared early December.

Rainbow Christmas Tree

This year, we went with a rainbow theme. The rule was to not have to buy any decorations with whatever theme we chose. I thought we would have enough baubles to make our own take on a rainbow, but we needed a few red and silver baubles to fill in the gaps. These were pretty cheap to purchase anyway and will most likely be used in the future too.

LEGO Friends Advent Calendar

We’ve also set up the advent calendars. We have two this year. A LEGO Friends calendar and one I bring out each year and fill up with lollies. The girls will take turns opening the LEGO calendar and on the days they don’t open the LEGO, they can open the tree one. This way it’s a win win win for all. Well I’m hoping.

Christmas tree advent calendar

Last year we didn’t do an advent calendar because we were away for half of December in the US. It’s crazy to realise nearly a year has passed since we did that trip.

Boho Pom Pom Christmas Trees Decor
My Boho Pom Pom trees are back out again too. They match well with our colourful décor and planters.

Christmas decorating at the front door

Our front door has also received the Christmas treatment with wreaths and a Christmas mat. I use Fusion-Loc hooks to hang my wreaths and stockings. They leave no residue and work on most non-porous surfaces.

All that’s left now are the Christmas lights out the front. I’m going to leave that job for my wonderful husband to do.

Do you put your Christmas Tree up in November? Or do you go with tradition and wait till December?

Fill Your Gutters With Water To Protect Your Home From Bushfires

0
protect your home from an ember attack

When a bushfire threat is near, the first thing to consider is your own safety. The next is to have an emergency plan in place. The third thing is to do what you can to protect your home from bushfires or an ember attack. Often the ember attack is worse as the sparks fly in the air and land on your roof well before a bushfire arrives on your doorstep.

My dad got to speak with a firefighter yesterday, who was on the frontline of the QLD and NSW border fires. He advised the best preventative a homeowner can do for their home is to create a water perimeter.

fill your gutters to protect your home from bushfires

To do this, you need to have your gutters clear of all debris and leaf matter. This should be done on an annual basis to prevent stormwater blockages, but it’s even more crucial when a bushfire approaches. (Having an ember guard is mandatory in rural areas prone to bushfires. As a preventative, mesh guard in gutters can also offer another barrier for protection.)

Once the gutters are clear, purchase a bag of tennis balls and use duct tape to wrap around them to make them larger. These will be used to bung or block off the downpipe entry point. Alternatively, you could use a rolled up t-shirt or even cut up a pool noodle. It needs to be 90-100mm in diameter to cap off the downpipes. Most houses have half a dozen downpipes, so you will need to count how many downpipes you have, to work out how many bungs (tennis balls, pool noodle pieces, old t-shirts) you’ll need.

cover over downpipe to protect home from bushfires

When the downpipe openings in the gutter are blocked off, fill the gutters with water. Ensure it fills the whole perimeter of the house. You only need the water level to be 1 inch.

This preventative measure is being recommended as too many people have been spraying their homes with the hose and the water simply goes down the roof and downpipes or evaporates due to the heat and wind. This tip is just one way to protect your home and will assist firefighters too as they do what they can to prevent your property from being succumbed to a bushfire.

protect your home from bushfires

While this is great information for anyone living in an area that could be affected by bushfires, we’re not even in summer yet. Ensure you have adequate insurance and that it covers for bushfires. If you have no insurance, now is the time to get it before an embargo is put on your area.

Of course, also be sure to follow instructions from authorities on when to get out and when to stay inside.

Resources on How to Protect Your Home From Bushfires

Some great resources with more information on how to protect your home from bushfires can be found here:

Protect your home from an ember attack

How to save your home from bushfires

Must have Bushfire checklist

Disclaimer: The information is intended to be of a general nature only. I do not accept any legal responsibility for any loss incurred as a result of reliance upon it – please make your own decisions and enquiries. Always use a licensed plumber for your plumbing needs. Always follow local authorities when a threat of bushfire is in your area.

Eco-Friendly Makeup Wipes You Need in Your Bathroom

0
eco-friendly makeup wipes to reduce landfill

If you have been looking for eco-friendly makeup wipes which are kinder to your skin, to the environment and to your back pocket, you need Beauty Mover in your life.

Wipes are an unnecessary evil to our sewerage systems. And they come in a range of forms

  • Baby Wipes
  • Hand Wipes
  • Toilet Wipes
  • Makeup Wipes
  • Cleaning Wipes
  • Window Wipes
  • BBQ cleaning Wipes

I think we have a wipe for EVERYTHING. And I do love the convenience of a wipe. But they do add to landfill and unfortunately, they are being flushed down the toilet, causing thousands of dollars to remove from our local sewer treatment plants.

Swamp Monster from TasWater
Wipes Swamp Monster from TasWater – A nationwide problem due to wipes

I still use wipes and won’t judge anyone for doing so, so long as they disposed of accordingly. There is a time and a place. Like that time Phoebe spewed in our hire car while driving down the Crowne Range. That packet of baby wipes was worth its weight in gold while we cleaned her and the car out.

Or cleaning dirty hands after the kids have been on a playground. One bout of conjunctivitis to MY eye, was enough to convince me wipes and hand sanitizer are needed in public places with kids.

But there are eco-friendly alternatives becoming available – and some of these conveniences we take for granted can sometimes be swapped with sustainable alternatives.

Eco-Friendly Makeup Wipes

One area I’ve wanted to decrease my reliance on wipes is when removing my makeup.

I am adamant about removing makeup everyday and will not go to sleep until my face is cleaned. I usually rely on a makeup wipe to remove the bulk of my makeup, and a cleanser to ensure anything left is washed away.

I was sent a pack of Beauty Mover wipes to test and review. In the pack, I got three applicators, which are re-useable, non-toxic and only need water to rinse makeup off.

Beauty Mover eco-friendly makeup wipes in bathroom

After each use, you can wash with mild soap and leave to dry for the next time you need to remove your makeup. After a week, you can put your Beauty Mover in the wash – but don’t add fabric softener.

Beauty Mover applicator close up

I was impressed with my first wipe. They are so soft and easy to use and they certainly took off my makeup. It didn’t take away all my waterproof mascara, but this is why I use a cleanser.

Using Beauty Mover Makeup Wipes in Bathroom

Beauty Mover Can Be Upcycled

One of the other surprising benefits to Beauty Mover is once they have had their use and need to be replaced, they can be upcycled into tyres or insulation. Just send them back to Beauty Mover and they will organise for your old wipes to be upcycled. It’s a great sustainable solution we can all get behind.

replace makeup wipes with beauty mover

Beauty Mover can be purchased direct from site. One pack is $29.95 and free shipping is included. I reckon these would make a great gift for yourself or all the women in your life for Christmas. Plus it’s just one step towards removing our reliance on the unsustainable one-use makeup wipe.

Disclosure: I was gifted a pack of Beauty Mover for review on Instagram, but I loved the product so much I dedicated a blogpost to it. All opinions are my own.

Planter Pouches for Storage and Indoor Plants

0
colourful planter pouches for the home

I love my planter pouches around the house. They add colour and pattern to the interior of my home.

a selection of planter pouches in my home

They also make it easy to use with plants – just stick the potted plant in, unlike ceramic pots where you have to take out the plant from the plastic pot to plant. And this can be a messy process – well it is when I do it.

favourite planter pouch for zanzibar gem

The planter pouches are also ideal for storage. I use another in my bathroom to hold hairbrushes and clips.

If you don’t know what to buy someone as a gift, I reckon one of these is ideal. Who doesn’t love a new plant in their home?

planter pouches fun in colourful interior home

Here are some of my favourite planter pouches available this season. It’s very hard for me not to add to cart!

planter pouches for indoor plants

  1. Miss Pots Monochrome Pouch Small $10
  2. Rangy Rang Blue Tile Planter Pouch $19.50
  3. Tutti Fruitti Medium Planter $39
  4. Miss Pots Pom Pom Pouch $19.95 to $39.95
  5. Playful Pouch $20
  6. Miss Pots Palm Leaves Pouch $10-$20
  7. Modern Lover Small Planter $29
  8. Harlequin Small Planter $29
  9. Greenhouse Medium Planter $39

If you’re looking for other stores to purchase planter pouches, you can read this post.

Make sure you get the right sized pouch for your pot. They often come in sizes small, medium and large. Measure the diameter to get a good fit. You want the pouch to be roomy, but not too loose it flops down to reveal the black plastic pot underneath. Alternatively, you could repot your plant in a inner pot – but I like to avoid this.

For the Miss Pots and Etsy pouches, you will need a pot plate to catch water. Use a small plastic plate if you can’t find one at your plant store.  The Gorman pouches are waterproof inside so you won’t need one – although it can’t hurt as added water protection.

Are you a fan of planter pouches? Which ones are your faves from the ones I’ve sourced online?

Disclosure: There are affiliate links on this post. Should you choose to purchase an item, I will receive a small commission at no extra cost to you. 


9 Kitchen Renovation Plumbing Tips

0
Kitchen renovation plumbing tips for a white scandinvavian kitchen design

The plumbing is only one aspect to consider when doing a kitchen renovation, but it is a necessary component to assist with the layout and design. These kitchen renovation plumbing tips are must knows to ensure you have functional space to cook and entertain in.

Kitchen renovation plumbing tips

What may look super easy on TV, is not always as simple when working out the best layout and including all the features needed to make your kitchen as functional as possible.

This post offers plumbing tips to consider for your kitchen, without the headaches of poor design or surprises you can’t fix once the kitchen is renovated.

A lot of home owners take on the role as project manager for their own kitchen renovations, and often, they really have no clue on when each trade is required or the correct sequence of events to getting the renovation complete.

If you do decide to take on the role of project manager and designer for your kitchen renovation, here are some considerations for the plumbing.

9 Kitchen Renovation Plumbing Tips

1.   Don’t change the plumbing

If you want to save money, keep the plumbing in the same area. With the sink waste and water services left in the same position, you can save on labour costs to chaise or saw cut the concrete to change the drainage. Water services are run in the walls, so these can be easily changed during rough in. But generally, keeping the sink in the same position will prevent a budget blow out and solve plumbing headaches.


Demolition of a kitchen usually starts with the plumber isolating the water and waste services to the existing sink and appliances. If the kitchen is to be a new design, the plumber will need to come back after demolition to rough in the services to suit the new kitchen layout. The plumber doesn’t come back to site until all the cabinetry is in, the sink has been cut into the benchtop and sink holes have been drilled into the bench/sink, ready for the tap installation.

2. Place the dishwasher next to the sink

The dishwasher should always get installed next to the sink under the drainer side of the sink. For some layouts, this may not be possible, but it’s the ideal installation to ensure an easy installation for the hoses and practicality for when you load dirty dishes from the  sink to the dishwasher. Extending the water connections and hoses leaves room for pipe bursts, plus they incur extra costs to install.

place dishwasher next to kitchen sink kitchen renovation plumbing tips
Kitchen by A. D. Design featuring Meir Black Tap Mixer. Photo by Julian Grimes Photography Pty Ltd

3.  Measure twice

Measure your appliances twice for your new kitchen cabinetry. Appliance retailers always say that dishwashers are a standard size which majority are, but there are subtle differences in a lot of models that can put a spanner in the works if the space allocated doesn’t fit your chosen dishwasher. Measure twice and you can’t go wrong.

4.  Choose the right sink

Choosing the right sink will depend on the look and functionality of your kitchen. It’s best to have a double bowl sink for double duty; one bowl for washing and rinsing and another for draining or available for use when the other bowl is occupied.

double sink for double duty in kitchen
Kitchen by Scope Building Solutions, Photo by Aspect 11 featuring Meir Champagne Tap Mixer

If you choose to have an additional filtered water tap and decide for these taps to be installed into the kitchen sink, ensure there is enough landing for the 35-40mm hole so your mixer tap can be installed. Alternatively, these taps can be installed in the benchtop but your cabinet maker will need to know the size of your mixer tap and location where the holes should be positioned to the sink.

5.  Think about the best sink position

Sink position is a matter of opinion. A sink in the middle of an island bench can make the bench look cluttered but it may be where the existing plumbing is. A sink near the window allows for natural light and can be less cumbersome, allowing the island bench to be clear.


6.  The biggest mixer may not be the best mixer

Choose a standard middle of the range sink mixer. Unless you love the look of a commercial veggie mixer and have the right bench support to hold the weight of such a mixer, there are many retractable kitchen mixers on the market which are affordable and won’t look so industrial. A standard kitchen mixer is easier to replace when it has done it’s time too.

7.  Allow enough water connections

If your fridge has a water filter and ice maker, ensure it is placed in an area where the water from the sink can be run to the fridge. This is why having a sink in the middle of an island bench can create a problem as the pipes can’t run around the kitchen.

Other areas to consider water points for are dishwashers, filtered water taps and butler’s pantry if there is a sink in there.

8.  Consider if a food waste disposal system is a must have

A food waste disposal requires a larger sink drain outlet – which means you can be limited on the type of sink.

They were an appliance to have in the kitchen,  but often when they breakdown, they can’t always be repaired and need to be replaced. Consider having a compost in the garden for food scraps and be mindful of what is washed down the kitchen sink.


A food waste disposal can also make kitchens smell if they aren’t maintained or used correctly. We took many disposal systems out than put back in due to the maintenance and smell caused from blockages.

9.  Get a stop tap under the kitchen sink

Consider getting the plumber to install a stop tap under the sink so that the water to the kitchen can be isolated at any time if needed. This is convenient if you have a flexi hose burst or leak from the dishwasher and need to turn the water off quickly.

While the plumbing is a small component to a kitchen renovation, it’s vital to get it right to ensure your kitchen is functional for everyday use. These kitchen renovation plumbing tips should help get it right the first time.

I Prefer a Legit Design Than a Cheap Knock Off

0
Legit design vases from Vanessa Bean

If you had the choice between a Louis Vuitton Handbag and a $30 look alike from the markets, which would you choose? For me, I’d buy the legit design than a knock off. Or I’d save until I could buy the legit design.

I personally don’t like seeing someone’s art imitated for a cheaper price. But I have seen it happen recently in Kmart. I’ve also read about it happening to other creators as well, where their unique designs have been imitated and sold for a fraction of the cost.

When I saw the new season of homewares available in store at Kmart, I was disheartened to see a knock off vase based on Vanessa Bean’s popular ceramic vases.

Kmart Face vases knock off from Vanessa Bean Vase

The Kmart face vase is a super sweet home accessory – minus the fake flowers and foam.

Kmart face vase

But it reminded me of my favourite vase, which took me a long time to purchase. Not because it was expensive, but because it was popular.

Vanessa Bean Vase with Daffodils

Vanessa Bean vases would sell out in minutes (sometimes seconds) when released on Etsy, and because they were only made one batch at a time, there were limited numbers. Once the vases sold out, you would have to wait for the next batch to be made and released for sale the next month.

I really wanted a Vanessa Bean vase for my Birthday one year. I tried for over a year to get a vase and I finally worked out a system which helped me get one.

Vanessa Bean Vase with Roses

When I finally received my vase, I wrote a post on how to buy one. I had many emails thanking me for the post and pictures sent of successful purchases because of my blog post.

Vanessa Bean Tea light Holder
A photo from a reader after successfully getting this Vanessa Bean Tea Light Holder

The handmade ceramic vases are now readily available. They are a piece of art which may not be everyone’s cup of tea, but I love them. Clearly the hype has died down around the vases as they haven’t sold out. And I can see the temptation to buying an imitation for $6, instead of a one-of-a-kind work of  art which has been handmade starting from $85.

Sadly, unless a creator has trademarked or patented their design, there are no grounds for legal action. And even if you do have a patent, you still have to pay for legal action for anything to be done. (Talking from experience here)

I love shopping at Kmart. Their storage pieces have helped keep my wardrobe organised. I’ve even used their pieces to style up my laundry. So I may a walking contradiction here.

But I only go in there when I have a specific need, and I avoid the home décor section.

I guess the point of the post is to encourage buying legit designs than cheap knock offs. A handmade design is always going to be more dearer than a mass produced piece, and while you may part away with more dollars, you will have more pride in owning something unique. Plus you’ve supported a local artisan who relies on that sale for income.  If you can support a local artist, do it.

vanessa bean vase with tulipsAs my budget expands, I am more inclined to purchase handmade pieces, or unique items no one else will have. I don’t want a fake. Buying less also means I have more money to spend on these pieces, if I so wish.

Do you prefer to purchase a legit design or knock off? Do you get concerned by the mass produced homewares which are bought today, and forsaken tomorrow?

Getting Rid of Mildew on Bathroom Walls

0
Getting Rid of Mildew on Bathroom Walls

If you have noticed grey, white or dark specks on the plasterboard or ceiling in your bathroom, you may have mildew. Mildew on bathroom walls is common as the dampness and lack of air flow prompts it’s growth. I noticed we recently had a mild growth of mildew on the walls above our shower, and I’m going to share with you how I cleaned it off.

getting rid of mould

When we bought our house ten years ago, it was a display home. So while it was fitted with a great range of features, there were some things like an exhaust fan in the bathroom that hadn’t been installed.

The tiles also don’t go to the ceiling.

As soon as we moved in, we got our electrician in to install an exhaust fan in the ensuite, but it wasn’t installed above our shower – it was installed in the middle of our ensuite (was the best place to install at the time).

As a result, the steam rises from our double shower and it can cause the plasterboard above the tiles to get damp.

Over the last few weeks, I’ve noticed dark specks above the shower and I knew I had to get onto cleaning it straight away.

mildew on shower walls

The difference between mould and mildew

If you have mildew in the bathroom, usually it is characterized by a grey white colour which can turn dark if left and not cleaned. It’s a fungi that sits on the surface of a damp area like the plasterboard, tiles or even glass in a bathroom.

mildew on bathroom walls

Mould is usually black and fuzzy and it is much harder to get rid of. Usually it grows in grout, silicone and plasterboard. Sometimes the only way to get rid of mould is to remove the surface it has grown in or get a cleaning specialist in to control and clean the outbreak. While there are natural remedies that can kill the mould spores, it won’t always take away the black spots.

Thankfully, in my case it was just mildew above my shower and I was keen to get rid of the unsightly view.

Getting Rid of Mildew on Bathroom Walls

I have use two products to remove mildew from my bathroom walls with great results.

I did use Koh cleaning product and I added 2 drops of Clove oil. Clove oil is great for killing the mildew spores. I left the spray on for 30 seconds and it only took one wipe to remove the mildew and the wall looks good as new. I used paper towel to clean the spores away first, and then my green cleaning cloth with more clove oil to prevent further spores.

get rid of mildew in the bathroom

mildew on bathroom walls gone

It’s been more than a year since I used that method, and I noticed the spots had come through again on the walls.

This time I used 1 cup of vinegar, 5 drops of clove oil and a paper towel to wipe.

I sprayed along the top of the shower and left the spray on for a minute. I used paper towel to wipe away – while this is not environmentally friendly, you don’t want mildew spores in your washing.

remove mildew with vinegar and clove oil

Before

mildew spots on white bathroom plasterboard wall

After

clean bathroom wall from mildew

As soon as you see any mildew in the bathroom, it’s important to clean it straight way so it doesn’t cause minor health issues like sinus. Mildew is a type of mould, so you don’t want it to become a bigger problem in the bathroom by leaving it grow. As soon as you see the spots, give it a spray and then wipe.

While cleaning the mildew is important, it’s crucial to identify what has caused the mildew in the first place.

The best ways to prevent mildew in the bathroom:

    • Open the window when having a shower to let steam out.
    • Always use an exhaust fan when showering to extract steam.
    • Wipe down walls with a towel to remove condensation.
    • Check for roof leaks or possible water leaks in the bathroom and get them fixed asap.
    • As soon as you see a mildew outbreak, clean it immediately and identify the cause – i.e. is the wall damp from a leak behind the wall or from moisture/condensation from what happens outside the walls? Generally, there will be a water stain or mark from water leaking inside the walls.

Have you ever had mildew on your bathroom walls? What did you do to get rid of it?

How to Prevent Water Damage From Hail

0
protect your home from water damage from hail

A few Friday’s ago, Phoebe and I were standing at our front door, amazed at the winter wonderland in our front yard. It prompted me to share tips on how to prevent water damage from hail as we were quite lucky. We did get a bit of water on our ceiling in the hall (just a small patch), but after inspecting our roof cavity, it was most likely melted hail seeping under a section of the roof and gully that wasn’t screwed down.

hail in front yard winter wonderland

It was so surreal to see our street turn white. The tiny pellets were small enough not to cause damage to cars, but the sheer amount of it caused damage to homes in our area.

hail on driveway of house in brisbane

Hail damage can be costly, and you need to check you have got adequate insurance to cover the damage.

But there are ways to prevent water damage from hail, and it really comes down to maintaining the gutters and stormwater drainage around your home.

This storm was unexpected, as was the hail and not all parts of Brisbane experienced it.

Preparing your home for this summer of storms could prevent the inconvenience and cost of water damage to your home. Here are some things to do so your house is fully prepared.

1. Clean the gutters and ensure they are fastened adequately

Hail is heavy and unlike rain, it won’t drain straight away to your downpipes – the small particles of ice just fill the gutters and downpipes. We had so much hail it overflowed the gutters and there were piles of ice outside the downpipes because they just couldn’t take in the ice.

Even the gutter guards and downpipe mesh caused piles of hail outside the downpipes.

hail damage to homes

gutter guard doesn't protect house from hail damage

This is why it’s import to ensure your gutters

  • Are clear of all debris
  • Are fastened correctly to the fascias with a maximum of 1 meter between fastenings.
  • Have adequate fall
  • Should connect to downpipes with 100mm diameter (90mm is standard but after what I experienced, I’m convinced they need to be 100mm)
  • When connected to the downpipes, these should be free of blockages

It’s important gutters are fastened correctly, because it’s a workplace health and safety hazard if they fall when filled with hail.

gutter damage from hail

2. Check your roof for leaks and any tile breakages

If you have a roof leak, now is the time to get if fixed before a storm hits. The hail will cause further damage to the exterior and interior of your home and you may not be able to claim damage on insurance if the roof is not well maintained and in good condition. Get your plumber out to check the roof and fix any leaks.

hail on colourbond roof

3. Invest in screens or protection around windows

The windows at the front of our house were protected by our garden. Unfortunately, the leaves are completely shredded, but they did their job and I’m grateful.

plants protect windows from hail damage

4. Check pipes connecting to rainwater tank

Often, the pipes connected to rainwater tanks have little brackets or bracing. Check they haven’t been damaged by the hail or are blocked so the melted hail can’t flow through to the tank.

5. After the hail has fallen, sweep it to the garden

When it’s safe to go outside, use a broom to sweep the hail from the driveways and footpaths to the garden. I should have used the broom to sweep down the hail from the roof (check for overhead powerlines if you do this). I swept our driveway because we had to go out and pick the girls up from school. I didn’t want to car to be unsteady when I reversed over the ice.

hail in back yardhail onto gardenI generally follow the weather radar to see the colour and location of a storm to know if it’s going to hit us. I have also signed up to Brisbane’s Early Warning Alert Service, which didn’t help me this particular time as I received the email after the hail had well and truly hit.

hail damages veggie garden

What tips can you share to prevent water damage from hail?

12 Tips For Getting Your Outdoor Area Ready for Summer

0
getting your outdoor area ready for summer

Getting your outdoor area ready for summer is probably on your to-do list of household chores now that the weather is warmer.

Often, the area can accumulate with leaf debris and dirt and sometimes it just needs a good clean to remove cobwebs and dust from the furniture. Usually by spring, the area needs a bit of an overhaul to get it looking like a place to retreat to.

Here are some tips for getting your outdoor area ready for summer

12 tips for getting your outdoor area ready for summer

1. Book a termite inspection

If you have a deck or any timber structures around the home in your outdoor area, it’s a good idea to have a termite inspection. This should be done yearly. Termites can cause terrible structural damage and there is no point painting that deck if you have termites lurking beneath. For peace of mind, book an inspection.

2. Remove all furniture from the space and pressure clean

When we’re in drought, this may not be an option. But if you have tank water or are willing to pay the extra price on your water bill, pressure clean the area. We have a small area to pressure clean and I use the Patio Cleaning head from Ryobi on their Pressure Washer which helps clean the area twice as fast.

Bec with RYOBI Pressure Washer and Patio Cleaning Kit

3. Use outdoor rugs to create designated lounging areas

I use a rug to create a designated lounging area in our outdoor space. The rugs can also help keep the floor cleaner. Recycled Mats have some fabulous rugs and mats for outdoor use. I personally bought a cheap Kmart rug and sprayed it with a waterproof spray. It’s been going strong for the last few years that we’ve had it.

4. Clean existing outdoor furniture

For timber furniture a light sand and oil can bring them up as good as new. For plastic furniture, a multipurpose cleaner can remove the dark dust that settles on the chairs. Wash the cushion covers and seating pads and check for mould. Get rid of anything with mould growing in it or on it.

5. Invest in affordable outdoor furniture

Some furniture like your wicker and cane furniture can fray from the rain, humidity or birds pecking to help build their nests for spring. Outdoor furniture can be expensive to replace, but there are budget-friendly outdoor furniture sets which you can get for under $1000. Invest in new if your furniture is worse for wear and can’t be repaired.

Affordable outdoor furniture set in black modern setting
Early Settler Silas Set $999

6. Buy UV Resistant cushion covers

Bunnings and Sunburst Outdoor Living offer a great range of UV resistant cushion covers. You also want the covers to withstand wet weather and prevent mould growth. I bought UV resistant fabric from Spotlight to cover over our outdoor furniture seat cushions to protect them from stains and mould. So far so good with these.

uv resistant cushions for outdoor area in banana leaf print

7. Check outdoor plumbing

It’s important to check the plumbing is not only adequate around your outdoor area, but it’s also clear to remove water away from the area during a wet weather event. Remove leaves from gutters and use your hose to spray down downpipes to ensure there are no blockages. If you do have water pool up through the gutters, you will need a plumber to come out with equipment that has better pressure to blast away any blockages.

8. Check lighting and power

When entertaining or using the BBQ at night, having adequate light is important. Check all lighting works and book an electrician to come out if more lighting is needed.

9. Clean the ceiling and fan

If you have an overhead fan, chances are it will have cobwebs or have rust marks. Give it a good clean and test that it works for when you need some air circulation during the hot months.

10. Increase the greenery

I love having potted plants in our outdoor area and you can make it a stunning outdoor oasis with a variety of different heights of plants and planters. Add an elkhorn to the wall to create an instant green wall.

update outdoor area with pot plants and staghorn
Katrina Chambers Outdoor Area

11. Clean BBQ and check gas installation

If you have a BBQ, now is the time to give it a good clean and check the level of gas in the bottles. Get them refilled or exchanged for full bottles. If your BBQ is fed by natural gas, it’s always ideal to get a licensed gas plumber to test for gas leaks. Protect your BBQ with a cover to prolong the exterior of the appliance.

12. Check your contents insurance

Now that your outdoor area is clean and ready for entertaining, it’s important to check you have adequate insurance to cover all that you own in our outdoor area.

Contents out in the open like outdoor furniture, moveable BBQs and play equipment (ie Trampolines) will be covered under contents cover (read your PDS though because they may also limit what is classed as outdoor contents). You need to read your insurer’s guidelines on whether they have limits on contents ‘out in the open ’ or ‘out in the air’. Some will only allow a small percentage of your contents sum insured to replace outdoor contents. (Suncorp covers 100% outdoor contents because they know how Aussies love to entertain outdoors and crazy weather events can happen quickly – especially in QLD)

So if you have only $20,000 contents insurance and a maximum of 25% of this is allocated to outdoor contents, you will only have $5000 to replace your outdoor contents. When you add the spring-free trampoline, outdoor furniture and BBQ, you have to consider if this stipulation will adequately cover you.

Check your insurer’s guidelines to ensure you have adequate insurance for what you own outdoors.

outdoor area ready for entertaining

What tips would you add for getting your outdoor area ready for summer?

Disclosure: All tips are from my personal experience and knowledge. For all insurance questions, direct these to your insurer. 

Choosing Taps and Fixtures When Renovating a Bathroom

0
choosing taps and fixtures for your bathroom renovation

Choosing the taps and fixtures when renovating a bathroom are all about personal style and are often bought to match a certain look. But aesthetics aside, what should you be looking for when choosing your bathroom taps and fixtures?

6 Tips for choosing taps and fixtures when renovating a bathroom

Mixer or hob mounted? Chrome or white? Square or oval? Black or white?

Trends change with the seasons and what may be in fashion in bathrooms today, may not be in season in a couple of years time. I have found though, the classics always win hands down so here are some tips to ensure you don’t regret your choices. After all you do have to live with them once they’re installed.

1. Expensive doesn’t always mean quality

Don’t choose expensive European brands of toilets, basins or taps. Don’t choose cheap crap either. Find a middle of the range brand that is easy to install and easy to get parts for.

Unfortunately many European brand toilet suites I have come across cost a bomb to fix or can’t be fixed because they no longer manufacture the parts so you have to pay to re-install a new toilet suite. Don’t make that costly mistake. Middle of the range brands to consider are Caroma, Fowler, Stylus, Posh, Porcher and generally most brands stored in Reece or Tradelink plumbing stores.

2. Functionality is important

Remember the use and function of the taps and fixtures before spending big money on them. Is it better to spend a couple of grand on a toilet or a weekend away? Everyone’s priorities are different, but remembering the function of a fixture may help you think twice about spending a load of cash on something designed to take your sh*t away. Remember what it holds and flushes and spend your hard earned cash on memorable experiences, not something that takes your poop away everyday. Invest in a quality toilet seat if you do spend a while sitting on the loo.

3. Consider future maintenance

Hob mounted and wall mounted pillar taps will have spindles that require a washer or ceramic disc. There are pros and cons against both but generally speaking, ceramic disc are more expensive but can save money on changing washers. However, washer spindles are affordable to purchase and cheaper to replace, but may need to be replaced more often.

4. Choose what works better for your actions

There are so many basin types to consider – recessed, semi-recessed or above counter are all stylish looks for a bathroom. When it comes to choosing what type of basin is best for you, do the lean-over toothbrush test. Will you forever be getting the front of your shirt wet with an above counter or semi-recessed basin? Do you want a basin that’s easy to clean?  Often hotel basins can help you decide what you do and don’t like. Take a few weekends away in the way of research.

choosing taps and fixtures for your bathroom renovation grey bathroom

5. Consider resell value

If you are thinking of selling your property after the bathroom renovation, think of fixtures which may draw an emotional response from a buyer. Often this can be in the way of added functionality. Add a second vanity basin, or install two opposite shower heads so two people can shower at the same time.

Buyers always like the functionality of a bathroom and if your house is lacking an ensuite, ensure that your main bathroom is multi-functional.

bathroom with a double vanity basin

6. Choose classics when in doubt

You can’t go wrong with chrome taps. When in doubt, choose chrome taps and white fixtures. Choose a colour scheme that won’t date by going neutral.

Avoid choosing gold plated or white taps because they tend to outdate quite quickly. They can also be difficult to source parts should they get scratched from maintenance or cleaning.

Hopefully these tips will help you when renovating your bathroom. Here are some more tips I shared on Houzz. What tips would you add to the list?

What Causes Brown Water Through Taps?

0
what causes brown water through taps?

Ick, Ick, ICK. No one wants to see brown water coming through their taps. But it’s not an uncommon occurrence in households. Here are a few reasons why you may have brown water coming through the taps of your home.

 What causes brown water through taps?

There are 3 common causes for brown water through taps and fixtures. Here are the common causes and how to fix them.

1. Galvanised Water Pipes

If you have an older home, where the water lines are run with the original galvanized  pipes, this will be the cause of the brown water in your home. Gal pipes will have rust inside them and this rusty sediment will add unwanted nutrients and colour to your water. The only way fix the water issue is to replace the water pipes with copper or a recommended plastic pipe.

2. Dirt Discharge

If your local council or water provider are working on the water main in your street, coloured water could be caused by dirt or pebble contaminants. Often this happens when the water line is cut to make a connection or if the water line has burst.

To fix, remove the aerators from the spouts of your taps to remove any dirt sediment. Run the water until the water is clear. Use a bucket to collect this water as it can be used to water the garden.

3. Hooked up to Tank Water

If your laundry and toilet are hooked up to rainwater tanks, the water can get contaminated with dirt and dust particles run off from the roof into your tank causing the water to go brown. If a rainwater tank is not maintained, it’s common for a sludge to develop in the tank and this can colour the water. It’s not the nicest way to be greeted by a toilet bowl full of brown water, and it’s not ideal for clothes washing. Call your local plumber to get the tank water clear again.

Here is a gal water pipe, half blocked with rust. Dad and I replaced the gal pipe as the client was getting brown water through all their taps.

What the orifice of a brown rusty gal pipe looks like, what causes brown water through taps
What the orifice of a brown rusty gal pipe looks like

When the gal was disconnected, the inner bore of the pipe was nearly blocked with this rusty sediment.

Gal pipes were used in older homes pre 1970’s. The sediment forms over time and is a reaction between the water and gal. It is recommended to replace this piping to copper or plastic over time, because the sediment can break off and cause issues with ceramic disc mixers taps and the seals in toilet cisterns. Let alone what it does to your health when you drink it.

When the pipes are replaced, clients find they have better water pressure because the water isn’t fighting to get through a smaller orifice.

The cost to replace a gal water main is greatly determined by how accessible the water pipes are in your home.

If you’re looking to renovate, I recommend replacing the gal. Your local licensed plumber will be able to give you a quote on how to best proceed with the replacement.

Have you ever had brown water flow through the taps in your home? Ever had a home with gal water pipes?

The 3 Best Grout Free Bathroom Wall Panels

0
grout free bathroom wall panels

Written in collaboration with Mr Wet Wall

Grout free bathroom wall panels are a much sought after solution for wall and ceiling finishes in the bathroom. Less grout lines offer many benefits to home owners. If you’re considering this option for your bathroom, you will want to know the 3 best grout free bathroom wall panels on the market.

White terrazo look wall panels for bathroom renovation Wet Wall

The benefits of grout free bathroom wall panels

1. No grout lines = less likelihood for mould growth
2. Less labour than tiles
3. Can go over existing tiled surfaces = less demolition
4. Can be used in wet space applications
5. Comes in a variety of colours and patterns to suit your interior look
6. Easy to clean
7. Waterproof

I’ve had enquiries on the blog about which wall panels are best and this post is going to explain the 3 common types of Vinyl and Laminate bathroom wall panels, with pros and cons for each.

Laminex Aquapanel

Aquapanel was one of the first products released when grout free bathrooms became a more sought after option. Unfortunately, this product hasn’t been developed further so it does have its pain points with installation.

Laminex Aquapanel grout free bathroom wall panels

Pros

• Been around on the market for a long time
• Readily available
• Cost effective – mid-range price point from $195 per panel
• Hardwearing

Cons

• Has limited style offerings
• 3mm thickness can make it flimsy to install
• Needs to be propped until adhesive sets
• Requires sacrificial boarding when cutting
• H trim vertical joiner doesn’t offer a seamless finish

Wet Wall Panel

Wet Wall Panels are an innovative product because they are 100% waterproof and mould resistant due to its hygienic vinyl material. It’s a sturdy product with 10mm tongue and groove joins which makes it easier and faster to install. There are a number of different styles and colours to suit your bathroom. Best of all, this product offers the best seamless look for your bathroom.

Wet Wall Black Marble Grout Free Bathroom Wall Panels

Wet Wall Lava Rust Colour Bathroom Wall Panel

Pros

• 100% water proof
• 100% mould proof
• Easy and fast to install
• Has a vast array of styles to choose from
• Has tongue and groove panels which offers a seamless application
• Offers good insulation and sound proof properties
• Grade 1 Fire Rating – perfect for commercial applications
• Offers 10-year warranty
• Lightweight only 7kg (2.9kg per sqm)
• 1000mm wide so few or no joins in the shower
• Prices start from only $179

Cons

• Walls can’t be custom sized, ceilings can be though

Spapanel

Spapanel is the premium wall panel on the market. It’s a premium marine ply product and BRANZ appraised so no need to waterproof the full height in the shower. Spapanel offers an extensive modern range of designs with over 50 to choose from. It’s a solid core product great for high traffic areas that require good impact resistance. This product is perfect for hotels and aged care facilities or that family bathroom which gets a lot of use. It also has a 15 year warranty.

Spapanel black and white panel for bathroom renovation

Spapanel Concrete Wall Panels for Bathroom Renovation

Pros

• Premium, solid core product
• Waterproof
• Offers decorative surface
• Removes need to waterproofing full height of shower/ wet room bathroom
• Extensive range to choose from
• Can withstand high impact & heat to 180°c

Cons

• Not DIY friendly – will require tradie skills to install
• Panels are on the dearer side, starting from $429 per panel

If you’re not sure which panel to use in your bathroom installation or if you would like further information about the panels, do contact Mr Wet Wall. They are the largest grout free Wet Wall panel bathroom supplier in the Australia and they will be able to offer a solution and quote for your bathroom needs.

What you do think of grout free bathroom wall panels? Something you’d consider for your next bathroom reno?

Disclosure: This post has been written in accordance with my disclosure policy

Bathroom Colour Schemes That Won’t Date

0
Bathroom colour schemes that won't date

When considering bathroom colour schemes, there is always an underlying concern on whether it will date quickly.

You want to get it right the first time because

1. It’s usually a big outlay of time and cost for a bathroom reno

2. You’re going to be living with it for the next 10-20 years before the next reno

I believe plumbers can offer great advice on which bathroom colour schemes date well as they are the ones often going back to bathrooms to service them. While white taps could look like a trendy choice against that black tiled splash back today, but in 10 years’ time they may not look so white. Thankfully taps can be changed quite easily.

Here are 4 bathroom colour schemes that won’t date. I think it’s important to mention  when choosing the colours for your bathroom, choose what you’re drawn to, and in quality materials you can afford.

Also, if you really want to make a statement with colour – choose taps or fixtures which can be easily changed over when the colour starts to fade. In no way do I want to encourage an ‘out with the old, in with the new approach’ as those taps and fixtures swapped for the sake of colour just adds to landfill.  However,  this can be an affordable update in the future rather than ripping down walls and tiles for a whole new renovation.

Bathroom Colour Schemes That Won’t Date

bathroom colour schemes that won't date

Black and White

Black and white bathrooms are one of the popular, and probably safest colour schemes to use if you want to get maximum years out of your bathroom.


It’s classic and works well with a number of different interior trends. Best of all the taps and fixtures in this colour scheme are affordable and easily accessible.

All Shades of Grey

There is a good reason why so many bathrooms on The Block use a variety of greys in their bathrooms – it’s a timeless colour scheme which can create the perfect base for timber accents and colour pops to add interest.


I have grey and white bathrooms in our house and it’s 14 years old. The bathrooms still look modern and I still think we can get another decade out of our bathrooms before we think of renovating.


The key to successfully using grey in the bathroom is not using too much or choosing a monochromatic scale so the bathroom doesn’t look dark and cagey. But if that’s the look you are after for your bathroom, who am I to disagree with you?

Navy and White

Like black and white, navy bathrooms are fresh and are the perfect base to add an accent colour like pink, red or even orange.


Think navy subway tiles or a navy vanity – if you love a contrasting bathroom scheme that is not as bold as black and white, this one is definitely a colour scheme to consider.

Neutrals With Light Tones

White always looks fresh, but a light neutral like beige interwoven with grey and black can add warmth to a dark bathroom. Lighter neutrals will also make a small bathroom look bigger. Lighter neutrals also lend themselves well to natural materials like stone and timber.

Bathroom colour schemes that won't date
Design by ACT Renovations with Meir Tapware

What bathroom colour schemes would you add to the list?

Main Feature Image Credit: Built / Designed by @sarahwiseart
Photography: @james.boulton

Need more design ideas for your bathroom renovation? Check out this post on Bathroom Galleries for Inspiration.

Bathroom Galleries to Inspire Your Bathroom Renovation

All Good Things

0
all good things

2019 is certainly turning into a year to remember with all good things coming into place.

It certainly hasn’t been easy street. There is the uncertainty with my eye which still is a concern but my last appointment showed no sign of the meningioma affecting my eyesight. I’ve pushed the potential surgery to the back of my mind because I’m hopeful for a miracle. I’m in an unknown zone where I don’t know what will happen in the future, so while I’m waiting, I will just keep living my best life.

I’ve also had friends go through difficult times. Unexpected diversions they never intended for their life. Despite the circumstances, there is always something good to see, despite  the circumstance and despicable behavior they have to put up with.

For me, the arrival of spring has seen plenty of good things to be grateful for.

The first was… I took the month of September off for work. Truth be told, I had a leader show me how to put leave in and we joked about taking a month off, with the intent to change it to less time… but I never did. I’m glad I stuck with it because 4 weeks of leave was quite wonderful. I was meant to take time to self-reflect on my workload, but the requests for work have been coming consistently, and I’ve said yes to most of them because it’s work I love to do.

Within those 4 weeks, we went away to New Zealand. You can read about our trip to Queenstown and Wanaka.

all good things family time New Zealand

The intention of the trip was to take the kids to experience snow. We experienced that and so much more. I forgot how beautiful New Zealand was. Of course, that trip wasn’t all perfect either. Our second last day was frustrating as we had a stone crack the windscreen on our hire care. I was so grateful I opted for the top protection for the car or else we would have been up for an unexpected bill. And yes, if you hire a car and you’re not at fault, you still have to pay an excess. Travel insurance would pay… but only to a certain limit.

While we were in New Zealand, I got an email to advise my blog had been shortlisted in the Amara Interior Blog Awards. These are international awards and they are judged on a global scale. I’m shortlisted in the Best Interior Lifestyle Blog in the International category. As far as I can see, my blog is the only Aussie blog out of the 5 listed in my category. The awards ceremony is in London on the 14th November. To be nominated was a surprise, but to make the shortlist – well I was pretty chuffed to be included.

all good things Amara Shortlist blogger 2019

Good things have been flowing at my part-time job too. I started back last Sunday night, and even though I forgot codes to change screens and I fluffed about on some calls, struggling to remember how to navigate the system again, I got through. That’s a good thing right there.

I also got an email from work saying I’ve been chosen for an experience spending a day with a Head Of within our company. I’m pretty thrilled for the opportunity and find it ironic after writing this post.

I recently relayed all the good things happening in my life at present with a good friend, and while it’s all great stuff going on, I can tell you this time 2 years ago, I was not in a good place. I was in need for a change. I was in financial arrears for work I had done and wasn’t paid for, and the situation got worse before it got better. It had an impact on my self-esteem because I felt like an entrepreneurial failure.

But persistence, consistency and trusting God has brought the right connections in place. Knowing what to say yes to and what to decline has been a wisdom rollercoaster. But here I am two years later, thankful for it all.

I’m hoping the last three months of the year won’t rush by like the last 9 months have. I will have prep interviews for Phoebe this term which is another change on the horizon. I will have 3 kids in school next year. I’ve dreamed of this day, but I also am reluctant for it because it means we’ve officially left the pre-school years.

bec and phoebe

And so there is a snippet of the good things happening here. It’s always nice to write it down in a blog post.

When was the last time you wrote down things you were grateful for? Maybe make time for it this weekend. Write a list of all good things to reflect on.

4 Steps to Organising a Walk-in Wardrobe

0
organising a walk-in wardrobe

Organising a walk-in wardrobe can be daunting at first, but when you have the right storage and hanging apparatus, it can be quite easy to achieve. We’re not looking for Instagram worthy organization here either. My photos are simply to show what we did and maybe you can get some inspiration for your own space if it needs a tidy up too.

My husband and I are lucky to each have our own walk-in wardrobe. The problem has been over the years Jacob’s wardrobe had become a storage room for the family’s swimming bags, outdoor toys and random bits and pieces.

walk-in wardrobe before

If the space was there, it was another place to store something that had no home, as there was no room in my wardrobe, obviously. Haha.

messy walk-in wardrobe before

It was a mess that needed a tidy up and some organisation. Here are the 4 steps we took to organising his walk-in wardrobe.

4 Steps to Organising a Walk-in Wardrobe

1. Remove everything except the clothes

Our bedroom became a warehouse of sorts as we removed everything from the space except the clothes. We sorted out what could go back into the wardrobe and what needed a new storage place. Or maybe it was something we could donate.

Once these items were sorted, we were able to check out the Kmart website to see what storage containers and bags could be used to store these items.

2. Purge through the clothes

The next step was going through the clothes to see what could be purged. There were ties which had seen better days, faded shirts and t-shirts which had supposedly shrunk in the wash no longer fit.

Anything which could be worn again was donated.

The clothes left in the wardrobe were sorted into tees, short sleeve shirts, long sleeve shirts, business shirts, suits, pants and jeans. Jumpers and accessories like caps, scarves and belts were put in a separate pile.

3. Buy new storage containers and hangers or utilise existing

I have bought the velvet flocked hangers for my wardrobe, but hadn’t invested in these for Jacob. I find they hang clothes well and keep the wardrobe looking tidy and organised. I bought 3 boxes of the velvet flocked hangers from Kmart, as well as their pant hangers which seem to be popular because 3 of my local Kmart stores had sold out.

walk in wardrobe organising

organising a walk-in wardrobe

We opted to go with 60Lt grey containers as they could hold (and hide) LEGO and other randomness.

organising a walk-in wardrobe

We also bought a new twin dirty clothes hamper. Everyone is different on where they store the clothes hamper, but I’ve always had one in each of the girls rooms and in Jacob’s walk in robe as it’s next to the ensuite. Our existing white one, which we had for 12 years, needed to be replaced. Kmart came in with the goods for this too.

organising a walk-in wardrobe

4. Everything has it’s place

The different piles of items we intended to keep were placed into grey felt bags or the grey containers. Coat hangers were swapped and a new hanging storage compartment was used for accessories and jumpers. We also got two shoe racks to store Jacob’s shoes… two pairs of my shoes may have snuck in here too.

organising a walk-in wardrobe
organising a walk-in wardrobeHere are the items we bought from Kmart to organize the walk-in wardrobe

organising a walk-in wardrobe

  1. 3 Felt Drawers $10
  2. 60Lt Grey Storage Container on Wheels $8
  3. Felt Under Bed Storage $10
  4. 6 Shelf Hanging Organiser $10
  5. 36 Lt Under Bed Storage Container $10
  6. Twin Laundry Hamper $25
  7. 5 Tier Pant Hanger $5
  8. 2 Tier Metal Stackable Mesh Shoe Rack $20
  9. 30 Flocked Hangers $10

Every time we walk past the wardrobe, it’s a joy to see it tidy and organised.

Now to keep it that way!

30 Family Friendly Activities in Wanaka and Surrounds

0
30 family friendly activities in Wanaka

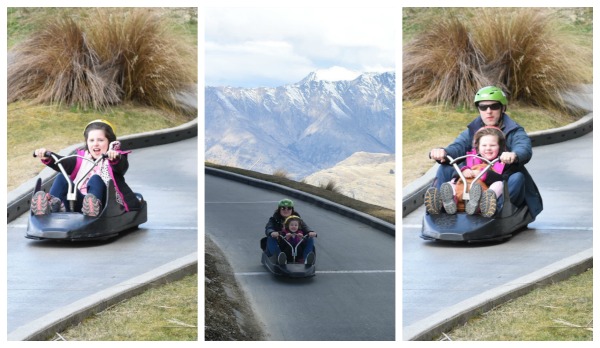
Wanaka is a must visit for families when heading to New Zealand. Here are 30 family friendly activities in Wanaka, of which we did all 27 activities, with the last 3 on our tentative list.

We spent a glorious 9 days in Wanaka and it wasn’t too much time to stay in one place. Not. At. All.

In fact, there were things we didn’t do, which we plan on doing on our next trip back.

So if you’re planning a trip to New Zealand’s south island, and not sure where to base the majority of your stay, I’m hoping this post will sway you to stay a bit longer in Wanaka. Queenstown is stunning, but Wanaka is even more picturesque and it’s laidback feel certainly stole my heart.

I’m listing these places in the order we visited them. Over time I may write individual posts on some places because there are too many photos and info to include in this post alone.

Also, there are some places which aren’t based in Wanaka, but they are a short drive and can be combined with other activities on your itinerary.

30 Family Friendly Activities in Wanaka

30 family friendly activties in Wanaka

1. Puzzling World

Our first day in Wanaka was raining, so we looked at our list of indoor activities and the first on our list was Puzzling World. The kids loved it here. We spent half a day here – most of which was trying to find the corners of the maze and working out how the heck to get out.

30 family activites in Wanaka Puzzling World

puzzling world maze 30 family activities in wanaka

2. National Transport and Toy Museum

The National Transport and Toy Museum is a short drive from Puzzling World near Wanaka Airport. The sheds are packed full of toys from every decade starting from the early 1900’s. There were toys Jacob and I had as kids. It was a walk through memory lane. The girls were amazed at the Barbie collection and the Sylvanian Families. Jacob loved seeing the LEGO, Star Wars figurines and Thunderbirds toys.

30 family friendly activities in Wanaka Toy Museum

30 family friendly activities Wanaka Toy Museum

The history of vehicles in the transport part of the museum was more interesting to the parents than the kids, but they were still happy to check it out.

30 family friendly activities Wanaka Toy Museum

3. Afternoon Tea at Pembroke Patisserie

What a foodie delight this patisserie is. It’s a short drive to Albert Town and we timed our visit half an hour before it closed. We had tea and some baked goods which were delicious. Definitely a must visit for morning or afternoon tea.

Pembroke Patisserie Family Activities in Wanaka

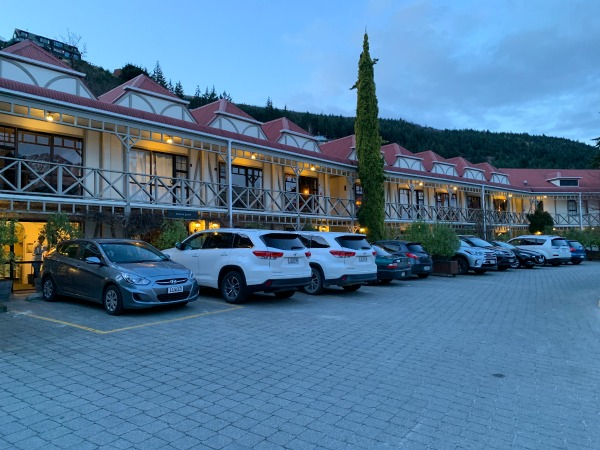
4. Hot Pools Oakridge Resort Wanaka

We stayed 9 nights at Oakridge Resort in a two bedroom apartment. The resort boasts 9 outdoor heated pools, of which 7 are hot tubs. Every afternoon of our stay in Wanaka, we headed to the pools. The kids swam in the two main pools, and Jacob and I watched them via the hot tub, cocktail in hand. I went through the cocktail list while we stayed there. This was a relaxing way to finish each day.

oakridge resort hot pools 30 family friendly activties in Wanaka

30 family friendly activities in Wanaka
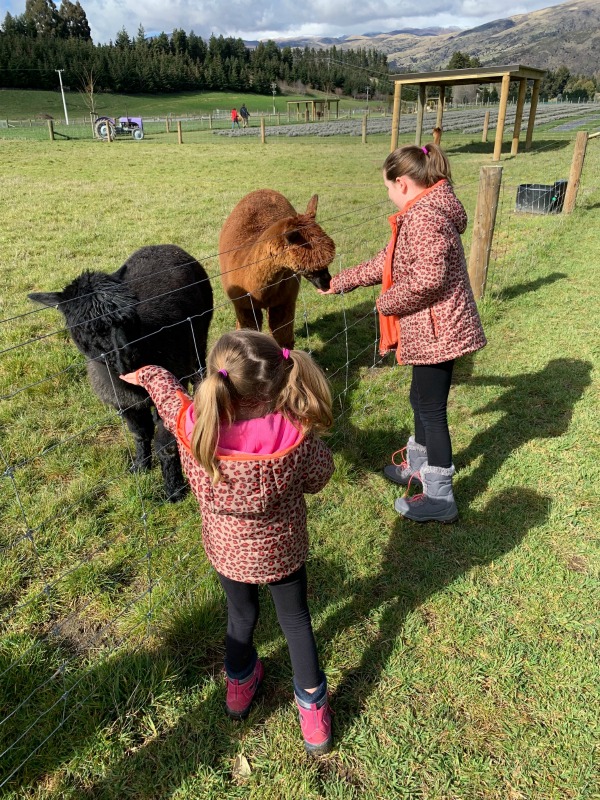
5. Wanaka Lavender Farm

Our visit to the Wanaka Lavender Farm was a highlight of our trip. We thoroughly enjoyed our stroll through the farm and the kids got to feed the animals.

30 family friendly activities Wanaka Lavender Farm

The farm is surrounded by stunning scenery and there are outdoor games you can play to extend your visit. Plenty of places to get that Instagram worthy photo too.

30 family friendly activities Wanaka Lavender Farm

30 family friendly activities Wanaka Lavender Farm

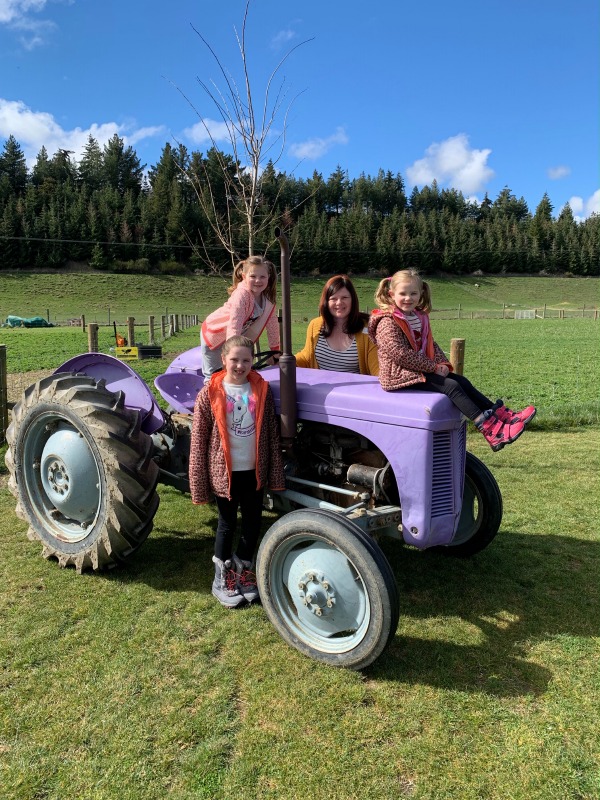
The lavender shop and café are quaint. We had morning tea where the girls had chocolate lavender ice cream, and Jacob and I shared a lavender tea and lavender infused sweets. I am still thinking about the truffles. This is a must visit for families in Wanaka if you want to experience a beautiful walk and interaction with farm animals.

30 family friendly activities Wanaka Lavender Farm

6. Climb Mt Iron

This walk is described as an easy hike for families. We did consider Roy’s Peak, but we knew it would be too long for the girls. So we opted for the ‘easy’ climb up Mt Iron.  But let me just say it is up hill. The whole walk is UP HILL. The gradient is quite steep and you will benefit from sturdy footwear or hiking boots. I wore my Frankie 4 Nat sneakers and I wished I worn my hiking boots – especially when descending down the steep gravel track.

Mt Iron 30 family friendly activities in Wanaka

But when you’re at the top of Mt Iron, the views are stunning. It’s worth the pain. Plus it’s necessary to work off the amazing food you consume while on holiday.

The girls were delighted to see rabbits hopping along our walk. Unfortunately they are a pest, even though the girls thought they were an attraction.

7. Hot Tubs Omarama

This is a must visit when heading to New Zealand. It is a 1.5 hour drive from Wanaka, but it’s so worth the drive. We drove out after climbing Mt Iron, so the hot tub was definitely needed to ease our sore muscles.

Each tub has a secluded view of a lakeview and mountain landscape. Unfortunately the top of the mountains were blocked by clouds, yet this didn’t matter. It was serene and an unforgettable experience.

Omarama hot pools for families

We had 1.5 hours at the tubs and it went fast. Night time would be amazing as you will be able to see the stars as Omarama is literally in the middle of nowhere. But it’s worth the drive for the Hot Tub experience.

Wanaka for families Omarama Hot pools

The Omarama hot tubs are ideal for families because you can have 8 people in a tub. They also cater for little kids where a step can be placed on the seat of the tub prevent them  standing on the inner ledge. You’re given complimentary jugs of water and each tub has its own adjacent room to change in making it convenient for getting dressed after your hot tub experience.

The girls got used to the heat of the hot tub. After a while, they did jump out to cool down and jumped back in again.

8. Drive to Arrowtown

Arrowtown is a delightful, yet quirky village which developed due to the gold rush era. It’s around a 1 hour drive from Wanaka through the Crown Range. (Beware – if you’re prone to car sickness, drive through Cromwell. Our 5 year old threw up her breakfast and we had to make a dash to Kmart in Queenstown to get her a whole new outfit and wipes to clean out the car!)

Arrowtown is surrounded by stunning mountain peaks and set near the Arrow River. There are shops to walk through, bakeries and patisseries to enjoy a meal at and the Chinese Settlement to explore, which houses the original huts used by the Chinese gold miners.

Arrowtown Drive from Wanaka

Chinese settlement Arrowtown

We ate at Provisions Café which is known for their delicious sticky buns. You must try one with a Bailey’s Hot Chocolate (ok that one’s not for the kids).

Provisions Cafe Arrowtown

Sticky Buns at Arrowtown

I also indulged in a steak burger with blue cheese sauce. It was AMAZING. Family holidays need to indulge the parents too. Food and drink are the best ways to do that.

steak burger Arrowtown

9. Check out Bungy Jumping at AJ Hackett Bungy Centre Kawarau

Just because the kids can’t bungy jump, doesn’t mean you can’t watch others have a go. Make a stop at the AJ Hackette Bungy Center at Kawarau. There is also a zip line swing, but kids need to be 8 or older to try it tandem.

AJ Hackett Bungy Jumping New Zealand

10. Play at the Dinosaur Park at Lake Wanaka

The kids LOVED this park in Wanaka. The park play allowed me to do some shopping in Wanaka, while Jacob hung out with the kids in the park. There are waterways to explore near the park, so when the kids get sick of the swings or the dinosaur slide, they will love picking up stones and wading their hands in the water.

dinosaur park Lake Wanaka

Dinosaur Slide Wanaka for families
Lake Wanaka for Families
11. Have Fish and Chips at Erik’s

You can’t go to New Zealand and not have fish and ‘chups’. We had read Erik’s was the place to go in Wanaka, so we headed here after our play at the Dinosaur Park. You could take your meal down to the Lake and have a picnic.

Erik's Fish and Chips Wanaka

12. Rock Climb at Clip n’ Climb Basecamp Wanaka

Our girls have never rock climbed, but we found Clip n’ Climb Basecamp Wanaka around the corner from our hotel. It was starting to drizzle with rain, so we paid for an hour for the girls and Jacob to have a go at indoor rock climbing. It was heaps of fun and a great activity for a rainy afternoon. Book online before you arrive though.

Clip n Climb Basecamp Wanaka

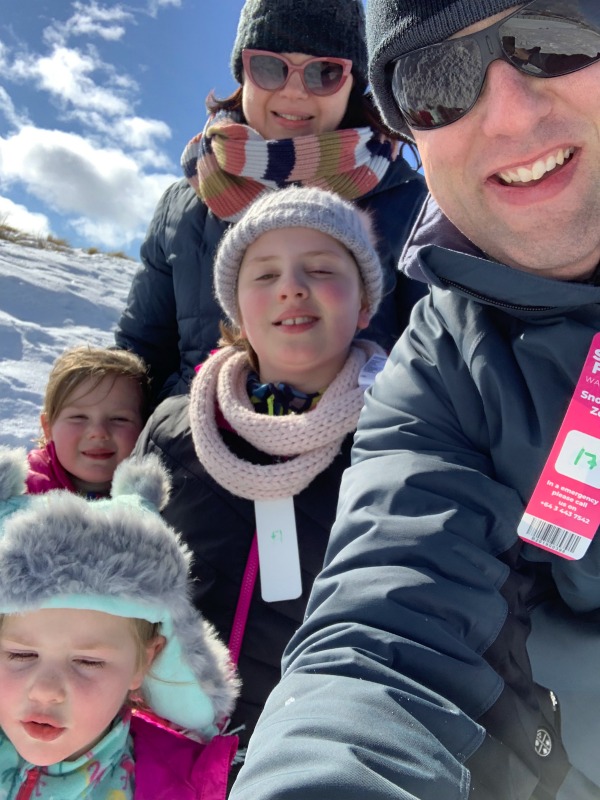
13. Visit Snow Farm and going tubing

The whole point of going to New Zealand in September was to get the kids to experience snow. We didn’t intend to ski, and after a bit of research, Snow Farm was the ideal place for a first time snow experience.

Snow Farm Wanaka for families

We snuck in a visit before it closed for the season. It was super quiet which was great for us because we had the tubing hill all to ourselves. Snow Farm Fun Zone is $10 per entry and then $15 per person for 1 hour tube hire.

Snow Farm Tubing

Tubing at Snow Farm Wanaka

This was the BEST experience for the kids’ first time in the snow. We also booked a Yello Shuttle to take us to Snow Farm. It’s a 40 minute drive from Wanaka and you must have snow chains when making your ascent up the mountain. We didn’t need them when we visited though.

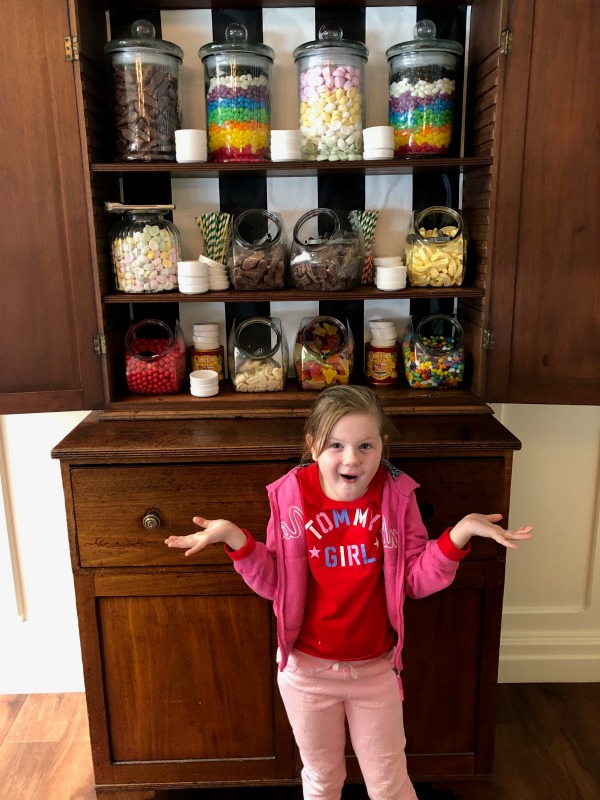
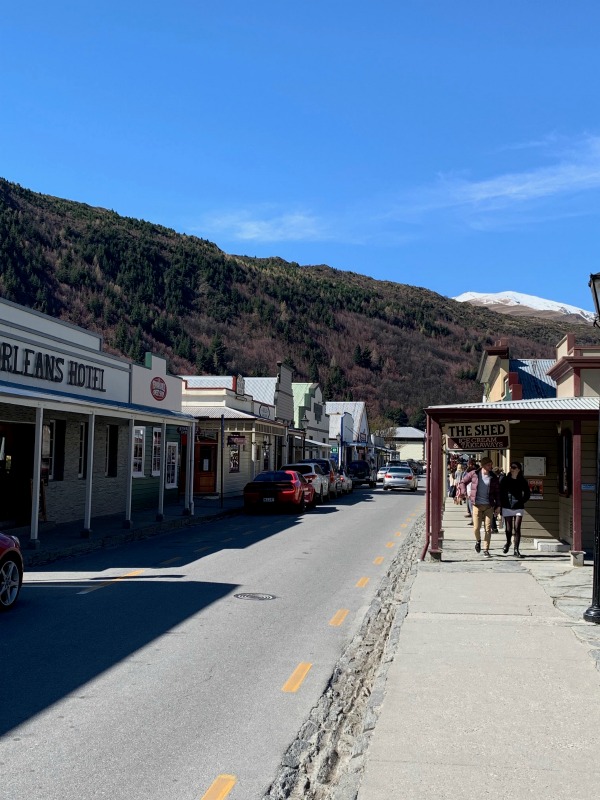
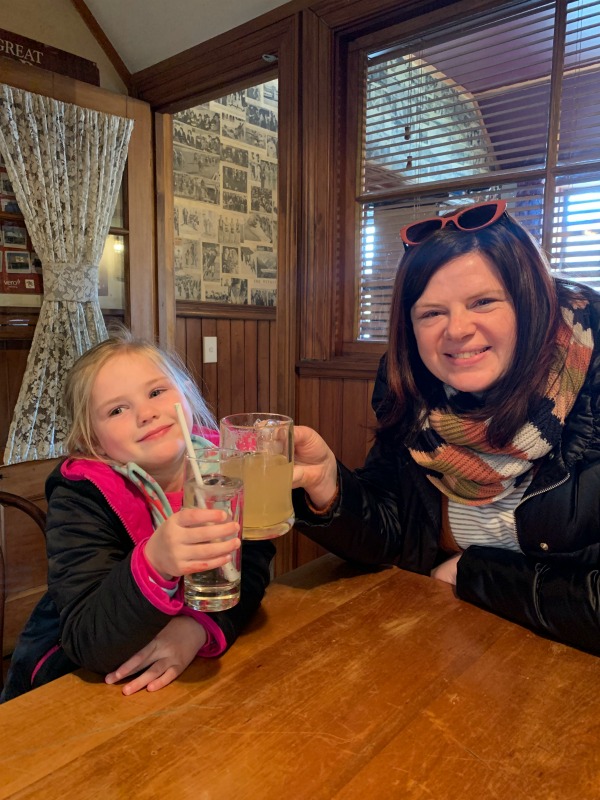
14. Cardrona Hotel for lunch and historical buildings visit

You can combine your Snow Farm morning with lunch at Cardrona Hotel. This hotel was another highlight of our visit to New Zealand. It’s 155 years old and has a gold mine shaft you can view inside, plus it’s warm and cosy and offers delicious food. There was also a lolly buffet which excited the kids.

Cardrona Hotel Wanaka for families

There are various historical buildings and a school you can check out while you visit. I love reading the history of this hotel and surrounds.

Cheers Cardrona Hotel Family activities in Wanaka

Cardrona Hotel

15. Goldfields Mining Tour and pan for gold

Maggie asked me before we headed to the Goldfields Mine that if she found a big nugget of gold, could she sell it for $300 and buy toys at Kmart with her profits? Sadly, it wasn’t to be because mining for gold is HARD work. I don’t envy those miners one bit living in the freezing cold conditions to pan for gold.

Goldfields Gold Mine

Even though the Chinese Village is a replica, it was still an interesting walk to see how the men lived and the terrain they had to navigate to mine for gold. We also paid for a tour which gave incredible insight into the history of the park, sluicing the ground with water guns and watching the stamper battery come to life which was used to crush the rocks to remove the gold.

goldfields Gold Mining Tour

stamper battery goldfields mine

Gold panning at Goldfields

There was a high fatality rate in the goldfields as safety wasn’t always considered. I found the tour really interesting, although the girls did get a little bored with the historical details. It’s a 45 minute drive from Wanaka to the Goldfields.

16. Goldfields Jet Boating

As a surprise for the kids, we booked Jet Boating at the Goldfields Mine. The jet boat flies “through the Kawarau River where the spectacular Gorge opens out into the placid waters of Lake Dunstan”.

Goldfields Jet Boating Wanaka For Families

We were the only ones on the jet boat so we got a few extra thrills and 360 spins. I’ve done the Shotover Jet before, and this one is just as good – and cheaper for a family. Minimum age is 5 so Phoebe was right to go on this jet boat.

Gold Fields Jet Boat

17. Drive to Cromwell and walk through ‘Old Cromwell Town’

On the way back from the Goldfields Mining, we made a stop at Cromwell. It’s known for it’s stone fruit, but back in the day, this town was settled by gold miners.

Cromwell for Families Wanaka Holiday

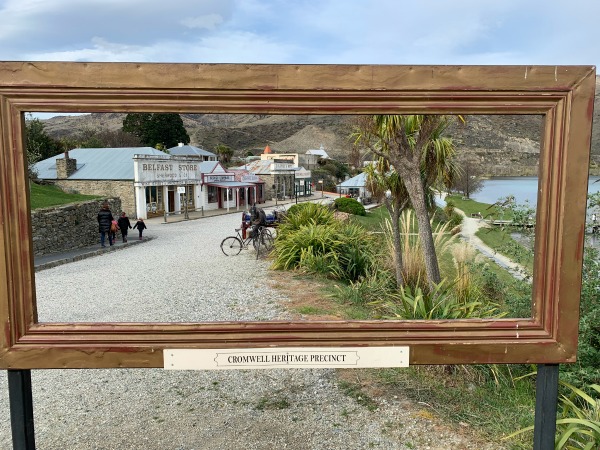
You can walk though ‘Old Cromwell Town’ which shows how the town was back in the 1800’s. The history of the development of Cromwell is quite interesting to read. When the Clyde Dam power station was completed in 1992, part of Cromwell’s historic business district now lies at the bottom of Lake Dunstan. It’s a bit sad that part of this history is lost due to development… but it’s not an unusual phenomenon around the world.

Old Cromwell Town

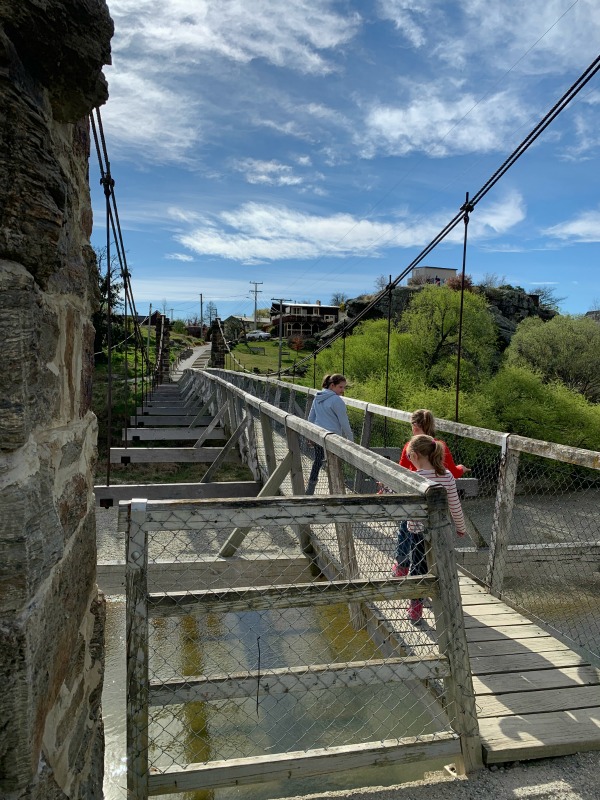
18. Drive to Alexandra and walk across the Shaky Bridge

Do drive out to Alexandra because you get a brilliant view of the Clyde Dam and it is extraordinary to see.

There is not a lot to do in Alexandra in terms of family activities. It’s well known for it’s wineries and the Shaky Bridge. You can also get a view of the Alexandra clock on the hill which has become a tourist attraction.

Shaky Bridge Alexandra

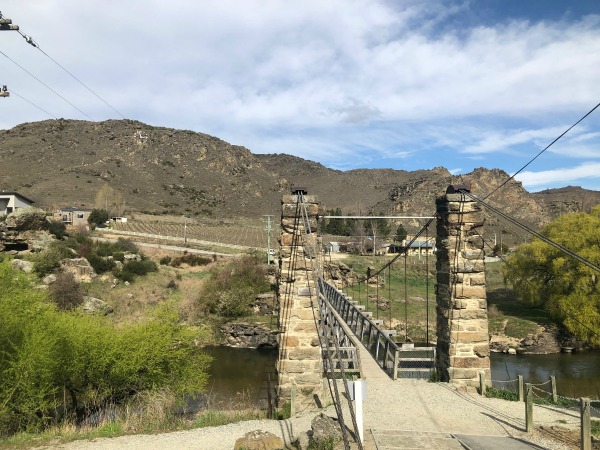
Does the bridge shake when you walk on it? Yes it does. It creaks too which actually made  me feel nervous and I had both arms holding either side of the bridge for support.

Shaky Bridge Alexandra

19. Enjoy a sundae at Patagonia Chocolates in Wanaka

So the artisan markets in Wanaka are listed as a must do in Wanaka. There were literally a few stalls to check out. I wouldn’t say they are a ‘must do.’ Thankfully, we made up for our disappointment with a chocolate sundae at Patagonia Chocolates. We also bought a few chocolates to eat at home. They actually never made it home because they were just too good.

Patagonia Chocolates Wanaka

Patagonia Chocolates Wanaka
20. Get a photo of That Wanaka Tree

This is a free activity which will take you a few minutes to see, but you may have to line up with other tourists to take your photo. It even has it’s own hashtag #thatwanakatree.

That wanaka tree

Budding photographers are known to take photos of the tree, which has turned this spot into one of the top attractions in Wanaka, which is crazy because it’s a tree in the middle of the lake. However, it’s become a sensation because the tree was captured as part of encouraging Wanaka’s tourism and has become somewhat of an icon, in it’s own right. Hence the line up of everyone wanting to get an Instagram worthy photo of the tree.

The water wasn’t lapping the Wanaka Tree when we were there, but it’s still a great place to check out because the scenery behind the tree is stunning.

21. Walk the Waterfall Creek Trail along Lake Wanaka

This is a stunning walk and easy for the whole family to enjoy. We walked to the Waterfall Creek and back again.

Lake Wanaka Walk - Wanaka for FamiliesThat Wanaka Tree is on this walking trail so you can combine both in the one trip.

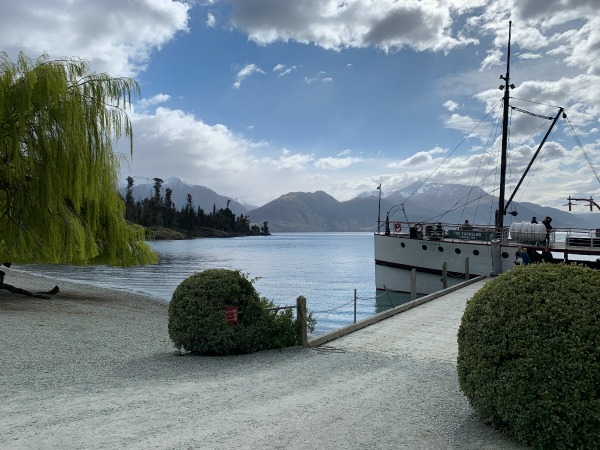
22. Walk the Wanaka Jetty for another photo opportunity

The Wanaka Wharf is a delightful spot to sit and enjoy the scenery of the lake. It’s a must do to walk to the end of the jetty and get a photo, with the stunning snow-capped mountains behind. There are plenty of water activities you can do on the lake too.

Wanaka Jetty

23. Watch a movie at Paradiso Cinemas

The Paradiso Cinemas have an old school approach to watching movies. You have to ring to book your tickets and leave a message on the answering machine if you call out of business hours.

Each cinema has comfy couches to sit on so you can relax while you watch your movie. There is also a Morris Minor in the cinema if you want to have a ‘drive in’ feel while watching your movie.

Paradiso Wanaka Cinema

We were the only ones in our cinema and the first to watch Abominable in Wanaka (a great movie by the way!) There is an interval during the movie, where you can have a toilet break or enjoy a freshly baked cookie. The kids loved it and it’s definitely another wet weather activity to consider when staying in Wanaka.

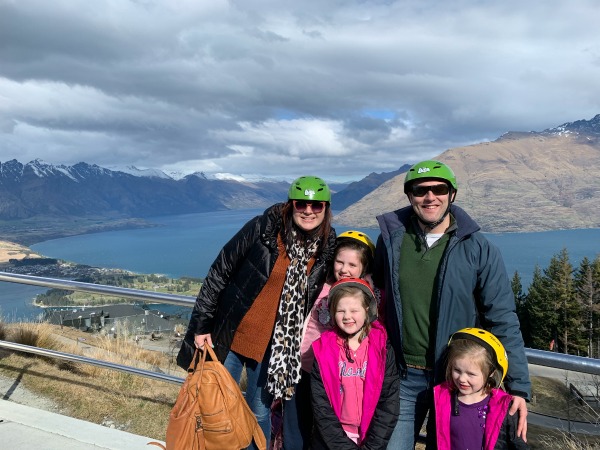
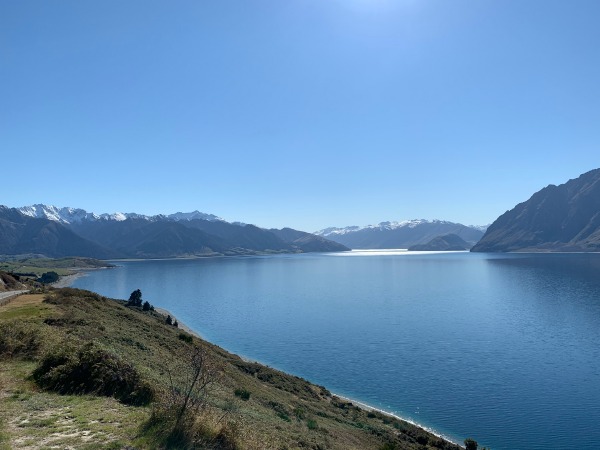
24. Drive out to The Neck

We made this drive on our last day in Wanaka, heading to Fox Glacier. The neck is  a stunning stop to take in the view of Lake Hawea and Lake Wanaka, separated by a neck of land.

The Neck Wanaka

25. Enjoy the serenity at Blue Pools

The Blue Pools are amazing sight to see. It’s a 15 minute walk to the pools from the entrance and you do have to cross over some bridges. It’s a great walk for kids and the sight of blue water is surreal. Definitely a must visit and a great place to practice your photography.

If you need a toilet stop, there are toilets 1km down the road from the Blue Pools.

Blue Pools Bridge Wanaka Blue Pools Wanaka

26. Walk to Thunder Creek Falls

Along the drive from Blue Pools is Thunder Creek Falls. Kids loved navigating through the rocks to the waterfall.

thunder creek falls

27. Have brunch at Florence’s Cafe

Florence’s Café was across the road from our accommodation. It’s a quaint café + gourmet grocery store and we opted to have brunch here. Do sit outside as you get stunning views of the mountains and cherry blossom trees. You can also purchase gourmet picnic baskets to take with you on your travels when road tripping.

Florence's Cafe Wanaka

28. HOOK

We didn’t go to Hook while in Wanaka, but we drove past it a number of times.

When we climbed Mt Iron, another family told us how awesome it was as they had done it the night before. Basically you pay to fish for salmon in the lake and the salmon is prepared for you to eat. It costs $5 to fish, $39.95 per kg of salmon you catch and then the prices vary depending on how you want your salmon prepared/cooked to eat.

We would have done this if Jacob and the girls would eat salmon.

29. Wild Wire Waterfall Cable Climbing

Wild Wire Cable Climbing is another activity on our bucket list which we saw advertised while at Cinema Paradiso. It’s an outdoor cable climbing experience in Wanaka. There are 3 different climbs available to suit your adventure tastes.

30. Warbirds Museum

Right near the Wanaka airport is the Warbirds Museum. You can combine a visit to the Warbirds Museum with the National Transport and Toy Museum. My parents visit the Warbirds museum every time they go to Wanaka. We kept this tentatively on our list as another wet weather activity, which we didn’t end up doing because the weather was glorious.

I’m sure there are PLENTY more things you can do in Wanaka, which I haven’t included. I’d love to know what they are. We will certainly be back again. Roy’s Peak, Wild Wire Cable Climbing and Kayaking are going to be on our list of must do’s next time we head over.

Have you ever been to Wanaka? What activities did you do, that I didn’t mention?


24 Hours in Queenstown for Families

0
24 hours in Queenstown for families

Queenstown is usually on the itinerary of every New Zealand holiday when visiting the South Island. We spent 24 hours in Queenstown before heading to our base at Wanaka.

The scenery in Queenstown is breathtaking. It truly is a must visit location, however it is busy with tourists and can be pricey.

We flew into Queenstown on a direct flight from Brisbane with Qantas. When you’re traveling with kids, direct flights means less stress. The flight in over the snowcapped mountains as we made our descent into Queenstown is truly the best way to start your holiday in New Zealand. The girls were so excited to see snow as this was the very reason why we flew over.

snowcapped mountains in Queenstown on flight

However, I think Wanaka is better for families. In fact, if you’re a family with young children, you will love Wanaka for its location, scenery, relaxed vibe and array of outdoor activity options which can cater to most ages. It’s also the ideal base to drive to the many smaller towns, rich with history, stunning scenery and amazing food options.

We had intended to do a snow experience half day trip where the shuttles would only pick us up from a Queenstown hotel (we were wary of driving on snow laden roads), hence our decision to stay in Queenstown for one night. But after a bit of research, we found a less expensive option in Wanaka, which meant we had a full day in Queenstown to enjoy.

We were told by locals Coronet Peak has sealed roads which are ideal to drive on if taking the family to the snow for the first time.

24 Hours in Queenstown – The First Day of our New Zealand Trip

24 hours in Queenstown for Families

Family Accommodation for 5 – Sherwood Family Apartment

We had a hire car, so staying outside of the main inner city area of Queenstown was an option for us. We stayed at the Sherwood which had an alternate, yet rustic vibe I really appreciated. Best of all the kids had a bed each. It was the cheapest accommodation I could find for our family of 5 which didn’t compromise on style (NZ$230 for the night from memory). There was free parking onsite and the restaurant is well renowned for its food. We opted not to eat here only because I wasn’t sure the girls would eat what was on offer.

Sherwood Hotel Queenstown

Sherwood Hotel Queenstown for Families

Where to Eat in Queenstown

Dinner – Fergburger

For dinner, we drove into Queenstown (5 min drive) to Fergburger. We got a free park on the street. Like the locals, we did wait half an hour for our burgers.

Fergburger in Queenstown 24 hours in Queenstown

But the wait was worthwhile. One of the staff saw my girls sitting on the bench seat outside while I waited in line to order our burgers. They passed out three cones of hot chips for them to eat while we waited. I was grateful for this as it was completely unexpected and we had left ordering dinner a little late after taking 2 hours to get through customs at the airport, another hour or so buying much needed snow gear at Mountain Warehouse, and taking our time to check in.  5 stars to Fergburger for customer service and making our wait with the kids more bearable.

hot chips at Fergburger

The staff were friendly despite the demand, and the burgers are worth the wait. I had the Chief Wiggum, Jacob had Sweet Bambi and the kids had a cheeseburger and chicken burger (there are kids burgers available not listed on the main menu).

Breakfast – Fergbaker

We are so original… but right next to Fergburger is the Fergbaker which is a bakery offering amazing delights. We needed something easy and light for breakfast as we were going on the TSS Earnslaw for a BBQ Lunch.

Fergbaker in Queenstown

There was so much choice… and I opted for a ham and cheese croissant (which I shared half with Phoebe) and the popular Boston Bun which is probably a morning tea option, but gee it was good. Definitely check this bakery out. I think I gained weight from walking in here alone but kgs don’t count when you’re on holidays, right?

breakfast at Fergbaker

24 hours in Queenstown for Families

Family Activities in Queenstown

Jacob and I have stayed in Queenstown before, pre-kids. It was a different type of holiday back then. Sleep-ins, wineries, day spas… all the things you can’t really do with kids.

In terms of family friendly activities in Queenstown, unless you go skiing, there isn’t a huge amount to do with younger kids. There are a lot of teen/adult activities like swings, ziplines bungies, wineries, shopping, day spas and the Onsen hot pools. I really wanted to do the Dart River Kayaks at Glenorchy… but we didn’t have the budget for it. It’s on the bucket list though when the girls are a bit older and we return for another holiday.

We couldn’t book the Onsen Hot Pools either unless we wanted to be split up. You can only fit 4 people per pool, so it’s not really catered for a family of 5. This is why Wanaka is a better base for families, in my opinion, as it gives you access to more family-friendly hot pools. (I will mention these in my next post)

Queenstown for families in 24 hours

TSS Earnslaw Walter Peak Gourmet BBQ Lunch

We booked the 10am TSS Earnslaw cruise to Walter Peak Farm. It’s a historical steam boat, rich with history and a delightful interior where you can sit and relax and enjoy the outdoor scenery.

TSS Earnslaw Boat

It was very windy on the water, but a lot of fun. The scenery is stunning and even though it was freezing, sitting on the burners helped keep us warm.

TSS Earnslaw for Families in Queenstown

Queenstown Scenery from Tss Earnslaw

Couple selfie on the TSS Earnslaw

You can walk through the engine room and explore the history at the bow of the boat where there is a mini museum. Walking out on the top deck allowed you to see amazing views of the mountains and surrounds.

TSS Earnslaw Queenstown Window

TSS Earnslaw Queenstown

We arrived at Walter Peak Farm for a sheep shearing show and this was then followed by a BBQ Buffet Lunch, which offered an array of New Zealand grown and bred produce.

Walter Peak Farm

Sheep shearing at Walter Peak Farm 24 hours in Queenstown

All the roasts you could think of were on offer. Everything was beautifully set out. The kids were thrilled with the lolly bar near the desserts. (Secretly, so was I!)

Maggie at the lolly bar at Walter Peak Farm BBQ 24 hours in Queenstown

After lunch, the girls were each given a brown bag of seed to feed the ducks by the water.

Feeidng the ducks at Walter Peak Farm

We checked out the gift shop and by then it was time to board our boat back to the wharf. The boat arrived back at Queenstown at 1:30pm.

TSS Earnslaw Docked at Walter Peak Farm

TSS Earnslaw cruise for families

Skyline – Gondola and Luge

Maggie and Phoebe made friends with another girl on the cruise, who was similar in age. She was travelling with her mum for the day. They were headed to the Gondola and Luge too, but they had an annual pass. I didn’t get the mum’s name but she offered to show her pass so we could get 20% off our tickets. The kindness in New Zealand was just beautiful to experience.

Queenstown Gondola

The Gondola is steep, but it’s the perfect way to get an overall view of Queenstown. It’s best in sunny weather. When you get off, there is a viewing deck and you may see someone bungie next door. Not really my cup of tea.

Queenstown Scenery view

top view Queenstown

There’s a Jelly Belly store, where the girls spent half their pocket money. We all got a laugh from the Jelly Belly tasting wheel where you could land on tasting a revolting jelly bean like vomit, dog poo or sour milk. I got sour milk which tasted like… sour milk. Esther got vomit, which apparently had a Bolognese ravioli aftertaste. Gross.

Jelly Belly Store Queenstown Gondola

You have to wear helmets for the Luge and catch a chairlift up.

Luge family time Queenstown 24 hours in Queenstown

We had a few scary experiences with the chairlift, but the staff were great at pressing the stop button to help get our kids on the lift. Mags decided to go head first on the chairlift, instead of bum first and she was literally hanging off the chair as it started its ascent. She was all good when staff intervened. Just remember to tell kids bum first when jumping on the chairlift as the safety bar comes down pretty quick once you’re seated.

chair lift for lugeEsther was the only one who could ride the Luge on her own. Our younger two (5 and 6) had to ride in tandem with Jacob and I. We had 3 Luge rides in total and this was heaps of fun and just the right amount. I often worry about self-driven rides, but the Luge is easy. Just remember to move the handle left and right, left and right to get movement again if you’ve halted from going too slow or hitting a flat part of the track.

luge fun in Queenstown

By the time we headed back down the Gondola, it was 4-ish. We drove through the Crown Range to Wanaka, which was the next part of our trip.

Best to check road conditions before driving through the Crown Range as you may need snow chains. The road will be clearly signed before you drive up the range.  We didn’t need the chains late in the afternoon and with it being early spring.

Alternatively, if the snow or windy roads make you car sick, you can drive through Cromwell, which takes a little longer but it’s a more gentle drive for the stomach.

What are your must do’s in Queenstown? If you had 24 hours in Queenstown, what would you do?

8 Affordable Ways to Update Your Home For Spring

0
8 Affordable Ways to Update Your Home For Spring

If you’re after some affordable ways to update your home for spring without heading to the shops to buy all new décor, this post is for you.

Sometimes when the weather changes I get a bit antsy and initiate a change in the home. Often the updates are minor, but they can make a big difference to me.

None of the tips are rocket science, but they can help you look at what you own in a different way.

update your home for spring

1. Add a vase of flowers

I usually get my flowers cheap from Woolies and bulk the bunch up with branches from our Magnolia tree.

I recently created this flower arrangement and placed it in our ensuite.  Raid your garden and see what you can find and put together to make an imperfect bunch and place it in a vase.

Australian Floral Arrangement

2. Swap around plants from the patio to indoors

I’m often swapping around plants in our house to ensure they get enough sunlight. I’ve learned a few things about shade tolerant plants. They still need to get some sunlight, so placing them near a window or outside undercover can give them a boost. Swapping plants from indoors to outside and vice versa can instantly update your home.

3. Change the tablecloth

I usually have a plastic tablecloth on the dining table because: kids. But I do have a collection of fabric tablecloths I like to bring out when the plastic one starts to look ratty or stained. A change in tablecloth can add instant colour and pattern to your dining room.

change the tablecloth for a spring update

4. Open the blinds

Opening the blinds and curtains can make a room look and feel brighter. Such an easy tip but one I don’t do often enough. I’m sometimes amazed how much light floods through when the day blinds are open.

5. Swap pillowcases

This is one of my favourite tips. If I’m itching to change the look of our bedlinen, instead of getting a new quilt, I change the pillow cases to patterned ones. It can immediately change the look of the bedroom, and for little cost. I’ve got my eye on these pillow cases from Add to Cart.

Floral pillow cases

6. Remove the clutter

Clear benches, organise shelves and drawers  – removing clutter out of sight can do wonders for the interior of your home.

Bathroom Drawer Magnetic Strip Hack
Some key tips here:

  • Hide vitamins and medicines in a glass cupboard. You will always open the cupboard for a glass of water, so it’s an easy way to remember to take your vitamins when they’re out of sight.
  • Put toothbrushes and toothpaste into the top drawer of the bathroom vanity.
  • Place cooking utensils into the utensil drawer.
  • Put books back in bookshelves or layer on the coffee table as a styling feature.
  • Create a nook for school bags.
  • Keep shoes in a wardrobe or in the garage.

7. Swap cushions

I have a few cushions put away that I often swap to for spring. Heavier textures like faux fur are changed for cotton or macrame style cushions. Sometimes I am a rebel and keep the faux fur out. Just swap the cushions from sofa to sofa and it will instantly change the look in your living room.

8. Clean the walls

If I don’t have time to paint, I give the walls and architraves a good wipe down with sugar scrub. It’s amazing how clean walls can make your home feel.

clean the walls affordable spring updates

Do you update your home for Spring? What tips can you share?

Make Your Own Australian Native Flower Arrangement

0
Make your own Australian Native Flower Arrangement

Do you love an Australian Native Flower Arrangement? I do. My appreciation and love for Australian native flowers has been inspired from creating craft posts for May Gibbs.

May Gibbs Petal Headband

I love having a bouquet of flowers in the home, and usually I buy them  from Woolworths or receive them for a special occasion.

I’ve needed Australian natives to style the craft posts. I’m grateful our gardens have an array of Australian natives planted. I was also inspired by a Facebook post by Stagency on adding a touch of luxury to your bathroom by adding a vase of flowers.

And so, I’ve explored my own garden to make my own Australian native flower arrangement.

By law, you aren’t supposed to cut flowers or trees on public land – including parks. It’s best to speak to your local council for approval before you cut any stems.

Here’s how you can make your own Australian Native Flower Arrangement

(I’m not a florist and in no way a pro, but this will guide you as you bunch your flowers and leafy stems together)

Materials

  • Secateurs
  • Flowers, leaves and branches for your arrangement (buy from Woolworths or look in your own garden)
  • Vase
  • Water
  • Aspirin or flower food (can also use Vinegar and Sugar)

Instructions

1. Gather your flowers and leafy branches. In this bouquet I’ve gone with Grevillea, Magnolia Leaves and Gum Nuts which I found on the ground at the local park – NOTE none of this was taken from someone’s garden. It was from the front of my house in our garden or retrieved from the ground.

Australian native flowers for an arrangement

2. Put your flowers and bulky natives in the middle and surround the flowers with the leafy greens.

3. Select a vase that will suit the arrangement. Neither of these vases worked for my bouquet.

glass vases

4. Use some brown string to tie the arrangement together so it doesn’t fall apart.

tie string around your arrangement

5. Cut the end stems on an angle.

6. Pour water into vase and add flower food (I used an aspirin, but you can also use vinegar and water)

7. Place the flowers in the vase and admire.

make your own australian native flower arrangement

The Grevillea only lasted a week. If I had put a Banksia in, I’m sure it would have lasted longer.

Australlian native flower arrangement

It didn’t bother me how long they lasted because it was all from my garden anyway.

Do you like having flowers in your house for Spring? What are your favourite blooms?

No One Asks for a Natural Disaster to Come to Their House

0
No One Asks for a Natural Disaster to Come to Their House Importance of house insurance

I’ve been on holidays from my job for two weeks now. But I’ve been thinking about people affected this week by the horrifying bushfires. It hits home when you can see the dust in the air and smell the smoke; when the news reports update us with more grim news of houses lost or a new fire that has sparked in a drought stricken area.

I look to the sky for rain, but there is no relief. Just wind and a belting hot sun.

I’ve also been saddened by the fires which have destroyed Binna Burra Lodge and parts of Stanthorpe and Tenterfield surrounds.

I loved our weekend in Stanthorpe. I’ve checked on my favourite stores to look for updates. When the fires are contained, and the area is rebuilt, do consider having a weekend away in these areas. Send some tourist money their way and support the local businesses who have been affected by these fires.

I’ve also been thinking about my colleagues in claims who will be working overtime to help people who have been affected by the bushfires.

It’s devastating when a natural disaster destroys the buildings and homes we love. Yeah sure they’re just buildings. But they are our homes. They hold history and memories. They also house our belongings – often items with sentimental value. There isn’t usually much time to pack them when you need to escape to safety.

But it’s hard to imagine these circumstances when the disasters aren’t occurring. And this is probably one of the most frustrating parts of my job. Explaining the importance of insurance and why it is absolutely necessary to read the Product Disclosure Statement (PDS) to know what is covered when a disaster does strike.

On every call I get on my phone, I try to leave the customer reassured with new information about what their insurance covers. Often, they are surprised with the new information because they’ve never read the PDS.

But this blog post isn’t about my frustrations with people not reading their PDS.

It’s more to encourage you to look at your existing home and contents insurance now to make sure you are covered sufficiently for your home. Ensure your home and contents insurance is up to date and hasn’t lapsed.

No one asks for a natural disaster to come to their house

No one is immune to bushfires or floods or cyclones or earthquakes – even if history is to prove otherwise; disaster can hit anywhere, at any time. Floods can happen to homes on hills and fires can sweep through an urban street, or a rainforest. The unexpected can happen.

The second reason why it’s important to check your insurance is when there are bushfires raging or flood waters rising, there will often be an embargo on the surrounding areas that are/or could be affected. Basically it’s a time exclusion where you are not covered for damage from an incoming event on a brand new policy. It’s important to have your insurance sorted out well before anything arises to ensure you are covered.

I’m often haunted by the calls from customers with lapsed policies, or those who took the typical Aussie ‘she’ll be right’ approach, thinking it would never happen to them, and it did.

How You Can Help Those Affected by Bushfires

  • Firstly, be in a better position to help others by making sure you have the right home and contents cover for your property. Check with local fire updates to protect yourself and your family. Leave when they tell you to leave. Remove firewood debris away from the home.
  • The Chronicle Outlines 6 ways you can help others affected by the bushfires – via donations of money, items and baked goods.
  • Consider having a weekend away to these affected areas in a years’ time after they have been rebuilt.
  • Purchase Christmas gifts from businesses affected in these towns, where roads have been blocked and business has been impacted by lack of sales or because staff have been helping their community evacuate. Styling You has a great post on places to purchase from in drought affected areas. My post on Stanthorpe lists some amazing businesses in the area you can purchase preserves, wine and even soap from. Look for businesses in the Peregian and Yamba areas (where fires are currently burning in these suburbs) and send some support their way too.

If you have been affected by the bushfires, I’m sorry this has happened to you and I grieve with you for your loss. I send prayers your way over the coming days as you regroup and face the extent of the damage.  Take all the support offered to assist you. It’s ok to cry over buildings and lost items. We don’t realise the impact of these things until they are lost. They’re tangible memories you can not replace. You can rebuild new memories though. God bless you and keep you safe. xx

Disclosure: This article is simply a personal post and is not meant to give financial advice in general. It has been written from my own perspective. All advice about home insurance is my own. I am not a financial or insurance adviser (but I do work in insurance as a customer specialist). To find out more about what insurance products may be suitable for you, contact your existing insurer or do your own research to find the right provider.

10 Ways to Make Your Toilet Smell Good Naturally

0
10 Ways to Make Your Toilet Smell Good Naturally

I love my house smelling pleasant as soon as a guest walks through the door. But even more so, I want my bathroom – especially my toilet to smell good naturally, without any whiffs of bad odours.

Let’s be honest, the toilet is going to get a run of bad smells due to its function and use. But there are ways to eliminate bad smells and present a pleasant smelling bathroom upon entry.

Here are 10 ways to make your toilet smell good naturally.

1. Open the window

Most bathrooms and separate toilets will have a window. Open that window to let fresh air IN. It’s amazing what smells can evaporate with the presence of new air.

how to make your toilet smell nice

2. Check all seals around the toilet

If you have a back to wall toilet pan or concealed waste toilet, you won’t be able to check the rubber pan seal. But if you can see the toilet pan collar where the toilet connects through the wall or floor, check the black rubber seal hasn’t deteriorated. The rubber flap prevents a manner of sewer gases. If it’s looking worse for wear or you can smell a bad smell the moment you bend to inspect, this needs to be replaced or re-sealed asap. It will mostly likely fix all your bad toilet smells.

3. Deodorize the grout and floor around toilet pan

One of the common reasons a toilet will smell is due to miss aims. Pee, when left on the floor to self-dry will make the floor smell.

It can be difficult to get this smell out of the grout if you have a tiled floor as grout is porous. I’ve seen all sorts of weird and wacky hints on Facebook on how to get the smell out of the floor.

Honestly, a more natural way to eliminate the smell from the floor is with a dusting of Bi-Carb Soda. Add a few drops of Lemon or Eucalyptus Essential oil and leave it sit for half an hour. The Bi-Carb will absorb the smells. For a deep clean, place vinegar in a spray bottle and spray the floor. This will create a bubble reaction. Give the floor a good scrub and the floor will smell fresh afterwards.

4. Clean the toilet and remove the toilet seat

A clean toilet does wonders in eliminating smells. Remove the toilet seat (if you can) to give a thorough clean and eliminate any odours from uncontrolled hose sprays.

I made toilet pod fizzies which I drop into the toilet bowl and it gives the bowl a brilliant clean, while emitting a fresh smell. I bought a small jar from Kmart to keep my fizzies on display, ready for when needed.

5. Clean the walls, doors and handles

I think this tip is self-explanatory, but cleaning all surfaces in the toilet room will ensure nothing offensive can produce a smell in the toilet.

6. Give the inner cistern a clean out

If the lid to your external toilet cistern can be easily removed, you can turn the water off, flush the toilet a few times to empty the water from the toilet cistern and give the internal cistern a quick clean.

I don’t recommend pouring cleaners or vinegar into your cistern as this can soften the rubber seals and cause the cistern to leak water into the toilet pan. I have seen some toilet cisterns accumulate with sediment from stagnant water, which can cause a musty smell. This is more likely to happen during summer if the cistern sits on a wall that faces the sun, and when the house is vacant for holidays.

7. Create your own Air Freshener Spray

Some air freshener sprays smell worse than the offending smell after a number 2. Make your own spray with natural ingredients to freshen the room. Tip 1 will also help expel any bad odours from the bathroom.

ways to make your toilet smell good naturally

8. Make your own diffuser

I have bought reed diffusers with a particular scent, and when I’ve brought them home, I’ve had to get rid of them as they have been too overpowering.

This is one of the reasons why I love using essential oils. I can diffuse my own scents which won’t give me a headache.

In all my bathrooms, I have a bowl of Himalayan Pink Rock Salt in bowls, with a few drops of essential oil. I got this tip from Katrina Chambers blog. This has ensured a pleasant aroma in the bathrooms. I use the salt in a bath when it needs to be replaced with a different scent.

9. Dab a drop of essential oil inside toilet rolls

You can make your own scented toilet rolls by dabbing essential oil into the inner cardboard roll of the toilet paper. This is one of my favourite tricks to help my bathroom smell good naturally. I usually use Geranium or Lavender.

10. Change towels regularly and get rid of the toilet mat

If you have a powder room, refresh the hand towel regularly. Wet towels can emit a smell.

And toilet mats may catch drips, but they are notorious for harboring smells. Don’t use them. They may be pleasant for your feet when it’s cold, but who knows what bacteria you spread on the floors of your house when you walk out of the toilet. Most toilets smell because of a toilet mat. If you must use one, ensure it is washed regularly.

How do you keep your toilet smell good naturally? Got any tips I haven’t covered?