Home Blog Page 2

Christmas Gift Ideas For Teachers and Educators

0
Christmas gift ideas for teachers and educators

It’s around this time of year I start to collate Christmas gift ideas for teachers and educators who have made a difference in each of my girls’ lives. I know receiving a gift of appreciation is not expected, but it’s a way to say thank you for a year of investment in their education.

Some schools have banned gifts to be given to teachers, or there is a restriction on what can and can’t be given (gift vouchers are a no-no for our school). I don’t like to leave it to the last minute to find a gift so I will generally start to think about practical gifts and have them ready so they can be given the last week of school

Christmas gift ideas for teachers

When you have multiple teachers to purchase for, a Christmas decoration or handmade gift can be a budget friendly way to say thank you.

In years past, I have ordered personalized stamps on Etsy, which were well received.

Personalised teacher stamp
Personalized Teacher Stamp

If you don’t have time to DIY your gifts, but still need some affordable ideas, here are some gifts to consider.

Christmas Gift Ideas for Teachers and Educators

Christmas gift ideas for teachers and educators - gallery of gifts

From left to right top row: Carry your cutlery kit, Bookbands Bookmarks
Middle row: Franke Green Drink Bottle, Carry Lunch Bag, Planter Storage Bag
Bottom row: Olive leaf Christmas Decoration, Lula Self-Warming Eye Masks

Do you buy gifts for your kids’ teachers? What Christmas gift ideas for teachers can you share that have been a hit before?

Disclosure: There are affiliate links on this post. Should you choose to purchase an item, I will receive a small commission at no extra cost to you. 

Mask Air Fresheners – Do They Really Mask The Smell?

0
mask air fresheners in the toilet

I have made my own air fresheners for the bathrooms since I went to a “make your own cleaning products” workshop a few years ago.

Making your own is cheaper, better for your health and when you have the ingredients on hand, you’re never without a spray.

But, I have had Mask advertisements in my Facebook and Instagram feed.  I recently took up their promotion of buying one box and getting their top selling products in a box – free.

The names of the scents and reviews had me intrigued.

Let’s be honest, the toilet can be the smelliest room in the house after a number 2. If you have one toilet, it’s likely you’ve walked straight into someone’s stench and had to sit on a warm toilet seat to do your business.

Often air fresheners add to the smell that has permeated the small room. Toilet sprays are sprayed before the toilet is used, to combat the smell and keep it contained.

This is not a new concept as we have had VIPoo available from supermarkets.

But Mask is Australian Made and ships from Byron Bay. The modern packaging and unique scents from musk sticks to fairy dust are not like the country garden and lavender scents available in stores.

After a week and a bit of use, here’s my verdict on the Mask products

Mask Toilet Spray

The key to the toilet spray is to spray into the toilet 6 times to create an odour barrier. The toilet water will have an oil slick which is to keep the poo smell contained in the toilet.

how to use mask toilet spray

After a week and a bit use… it does contain the smell somewhat and offers a more pleasant aroma. We used Green Tea and Lemongrass and there are various other scents to choose from.

Green tea and lemon grass toilet spray

The Mask toilet spray comes in a small 60ml bottle. I’m not sure how long it will last, but the scent is unlike what I’ve smelt before. It’s very pleasant and fresh.

Mask Air Freshener

The Mask air fresheners use essential and fragrance oils for their sprays. While they are paraben and phthalate free, I’m wary of fragrance oils and how they can affect our health. With that said, I do love the fragrance and a small spray goes a long way.

Musk sticks is a favourite to spray in the bedrooms for a quick scent refresh.

Mask musk sticks air freshener

For the toilet and bathroom, the Lychee and Peony are pleasant and it offers a long lasting scent in the bathroom.

The packaging is modern and the bottle sizes mean they are travel friendly. They’re perfect to spray in public toilets when you have to take the kids and the smell is pungent!

If you are looking for a new air freshener or something to use in the loo, I’d definitely buy these again. I’m really impressed with the scents and how long they linger once sprayed.

Supporting an Aussie made business is also another big tick for me.

You can shop for Mask here. Or wait for the ads to come through your social feed like I did!

Have you used Mask Air Fresheners? What did you think?

Disclosure: There are affiliate links on this post. Should you purchase an item, I will receive a small commission at no extra cost to you. 

What Causes Leaking Showers?

0
What causes leaking showers

What causes leaking showers? There are a few reasons why your shower may be leaking. Here are the common problems and how they are detected. 

A common problem in older houses is leaking showers. If your bathroom is over 15 years old, you may come across a leaking shower in your own house. Unfortunately, sometimes a leaking shower can occur sooner than expected.

What causes leaking showers?

There are a few reasons why your shower may be leaking. Here are the most common shower leaks.

  1. Waterproof membrane failure. The disintegration of the waterproof membrane in the shower allows water to run under the shower floor and walls.
  2. Faulty shower glass cubicle. If your shower cubicle has a glass wall and door, faulty installation can cause water to seep under the walls and door.
  3. Shower breech tee piece or the pipe combination in the wall, leaking on a soldered joint.
  4. Deteriorated plumb dinger or puddle flange – where the waste pipe has worn out and needs to be replaced.
  5. Water leaking behind tap spindles into the stud work cavity of the shower.
  6. Poor external sealants like grout and silicone deteriorating allowing water to track through the shower floors and walls.
  7. Leaking shower rose as the thread seal has deteriorated or the shower rose has calcium buildup causing it to leak.

How can you test a leaking shower to find the cause?

There are a number of tests that can be done to work out what could be causing the shower to leak. It is a process of elimination and cancelling out possibilities.

The tests are best completed by a licensed plumber who can pinpoint the exact cause of the leaking shower.

Testing the water pipes in the wall

If the shower is leaking all the time – even when the shower is in use, this indicates a leak is coming from the hot or cold-water pipes. The most common leak is on the pipe combination in the wall.  A pressure test done by a licensed plumber can detect a loss in pressure in the pipe, indicating a hole in the pipe.

Sometimes a pressure test may not find the leak and an acoustic or sound leak detection test is done.

A plumber will locate the leak using specialist electronic sound equipment. This test can provide the general location of the sound caused by the leak.

The water pipes in the shower wall are always under water pressure and water is only released through to the shower rose when the taps are turned on. If water is found leaking when the shower is not used, this water pipe leak will be on either the hot or cold-water lines that meet at the breech.

If the leak appears to be sporadic, your plumber will test the shower tray and walls.

Spray and Thermal testing the walls and floors

A spray test to the walls is using a handheld shower to spray directly to the walls and floor. Your plumber will check if water leaks through these areas using a visual inspection or a thermal camera when hot water is used.

Thermal testing is also another way to confirm if water is leaking through the floor or walls of the shower cubicle. Thermal testing uses hot water to spray on the floor and walls and the use of a thermal imaging device can show in red where there is moisture.

Shower tray testing

To test if a shower tray is leaking, the shower waste will be sealed. The shower tray will be filled with water and left to sit for an hour or so.  Some plumbers will add tracer dye to visually see where the water is leaking. If the water has started to leak onto the bathroom floor or behind the wall into a hall, you know that the shower base needs to be replaced.

How to fix a leaking shower

Once the plumber is able to locate the cause of the leaking shower, they will put forward a quote to repair.

If the leak is on the shower combination, the pipework can sometimes be accessed through the other side of the shower wall. This prevents having to penetrate through the tiled wall and waterproof membrane which instantly means the redo of the bathroom.

Leaking shower floors and walls will have no other choice than to rip up the bathroom and start again. While there are epoxy seals that can be installed over shower floors and bathroom tiled floors, this is a temporary solution. It can make the floor water resistant, not waterproof.

Can I claim my leaking shower on insurance?

Leaking showers are usually an exclusion under home insurance. It’s one of the common leaks in bathrooms and usually due to the deterioration of the materials in the wet space.

It’s best to read your insurance Product Disclosure Statement to see how your insurance policy will respond to your leaking shower.

This post was one of the first blog posts I wrote in 2012. It has been updated with new information. Always talk to your licensed plumber on how to best locate the leak on your shower and the right approach to repair it. 

How to Choose the Right Tapware for Your Home

0
How to choose the right tapware for your home - Meir Mixer tap in curved white kitchen.

Consider these tips on how to choose the right tapware for your home. Functionality, design and quality are all equal considerations. But a lifetime guarantee should be the deciding factor when making your selections.

Sponsored Post

Decision making in a short time frame is a normal part of the building and renovating process. However, it can feel daunting once choices are made, to ensure the materials chosen will work together for the overall look and functional purpose of the room.

To ease overwhelm when making selections for the wet areas of your home, considerations should be made on how to choose the right tapware for your home.

While budget can be a big motivator, it shouldn’t be the driving force. Building or renovating are processes you don’t want to have to redo twice. Getting the right tapware installed can give peace-of-mind with your selection choice and future longevity of a functional wet space.

WaterMark Label is a must

Whatever tapware you choose for your bathroom, kitchen, laundry, powder room and even your outdoor kitchen must display the WaterMark label.

Outdoor kitchen mixer with pull out spray by Meir. Lifetime guarantee.
Image supplied by Meir

The WaterMark label is a certification stamp on the tapware to confirm it has been certified by authorities and conforms to the Plumbing Code of Australia.

If your chosen tapware does not have the WaterMark label, it is illegal for your plumber to install it. Tapware without the WaterMark has not been checked nor certified to ensure its fit for purpose and meets relevant Australian Standards relating to product quality, including health and safety.​

Type of Finish

The availability of tapware colours gives many builders and renovators plentiful choices for their chosen finish. It’s important to find out what type of finish has been applied to your chosen tapware. The type of process will determine the durability of the finish.

The three main processes used to create colour finishes for tapware are powder coating, electroplating and physical vapour deposition (PVD) coating.

PVD is considered the most robust and hard-wearing of finishes with a consistent colour deposit process which produces a uniform colour on the tapware and is durable in hardworking areas.

Powder coated tapware is considered a budget friendly finish and will fade with use, however it is available in a variety of colours.

Electroplated is the most common of finishes available in Australia, but if you’re after the best finish, PVD coating will outlast them all. Meir is the leading brand to produce PVD coated tapware.

Wall mounted or installed through bench

It’s a matter of personal choice to install tapware in the wall or through the bench. Wall mounted tapware creates additional space on the bench and can be visually pleasing. Yet a bench mounted mixer can draw the eye with an elegant spout. A bench mounted mixer can cost less to install than wall mounted tapware and can be easily isolated from water supply with a stop tap in the cabinetry.

Meir wall mounted tapware
Image supplied by Meir

Check the Warranty

Tapware will come with its own manufacturer’s warranty. A rule of thumb is the shorter the warranty, the increased risk that tapware will need to be replaced sooner than expected.

A greater warranty period is an assurance from the manufacturer on the quality of their tapware.

Replacing tapware should not be a regular occurrence as it contributes to landfill. It can also be an unexpected extra cost to a homeowner had they invested in tapware with a lengthier warranty period.

Lifetime Guarantee

There are many products and processes that come with a limited guarantee, but Meir is the only tapware brand in Australia to offer a Lifetime Guarantee on their tapware.

Meir’s investment into high engineering, consistent manufacturing standards and selection of the best quality parts and components from Europe is the reason why Meir can offer a lifetime guarantee on their tapware.

Meir Mixer tap in laundry
Image supplied by Meir

This assurance is peace-of-mind for builders and renovators who purchase Meir tapware. Tapware can be the cause of many future problems as it is the hardest working and toughest-handled device in the bathroom or kitchen.

The Lifetime Guarantee should be a driving influence when choosing your tapware as it’s an assurance and certainty in terms of quality, design, and functionality of the tapware.

Check out the full range of Meir tapware on their website.

Disclosure: Lifetime guarantee is on all parts, finish and components. Does not include the Lavello range. This post has been written in accordance with my disclosure policy


Lovestone Cottage Montville Getaway

0
Lovestone Cottage Montville Getaway

Our Montville Getaway was the perfect way to celebrate our anniversary. 

Celebrating milestones in life is a wonderful privilege. On the 30th April this year, we celebrated 18 years of marriage.

Usually, we celebrate with a day out or a meal at a restaurant. One year we even had a picnic in the living room. But this year we were intentional about going away for a weekend without the kids to a romantic destination.

The only problem with going away on our wedding anniversary weekend is that it falls on the May long weekend which means most luxury accommodation properties have a 3 night minimum stay.

This year though, Mother’s Day didn’t fall on the weekend after the May long weekend, so we booked our 2 night stay at the newly renovated Lovestone Cottages at Montville.

Day view of spa bath at Montville Rosewood Cottage

Montville is a special location for us because this is where Jacob proposed to me – in a teddy bear shop, which is now a Real Estate Office.

Narrows Escape has been on our list of properties to stay at, but it wasn’t available for the weekend we needed.

Lovestone Cottages was available and the location was perfect.

Lunch at Secrets on the Lake

We started our weekend with a lunch at Secrets on The Lake which I had no idea was so picturesque! You could nearly think you were in New Zealand.

Photo at Secrets on the Lake

I actually can’t wait to take the kids here for a lunch. The food was so delicious and the view was stunning. I had a Lavender Gin Cocktail to set the tone of the weekend.

Lavender Gin Cocktail
Cheers!

Before we checked into our accommodation, we noticed signs for a Mater Home Lottery Display, which was open for the public to view. We had to go and check it out! And gosh… what a property with an amazing view! We may have gotten ahead of ourselves and dreamed what it would be like to wake up and work in Montville with that amazing view.

Mater Lottery Home back view Montville

The backyard is an entertainer’s dream. Every room has been positioned to allow the outside in. The only downfall – no pool. But with beaches only a drive away, it probably wouldn’t be a huge deal breaker.

Rosewood Cottage at Lovestone Cottages Montville

Our Cottage was only a minutes drive from Lake Baroon at the top of the hill. We stayed in the Rosewood Cottage which has been recently renovated. Our stay was gorgeous with a fireplace and floor to ceiling window view next to the freestanding spa.

indoor spa bath at rainforest cottage

Breakfast was included in our stay, featuring local produce. We could cook it on the BBQ and eaten outside in the garden.

One of our favourite activities to do together as a couple (and as a family) is go for a bushwalk. We hiked the Kondalilla Falls and Picnic Creek Circuit.

Rainforests and waterfalls ground us. We like to take the girls for walks too, but it was serene walking just the two of us and no complaining of whether the walk was finished yet. The time spent walking, breathing and hearing the sound of running water and rustling leaves… it certainly restored my soul.

Kondalilla Falls

We had lunch at The Barn on Flaxton, which is a homewares shop, deli and café. I had the most delicious salad and had trouble choosing a baked dessert. The variety to suit all palettes and dietry needs was amazing.

The Barn at Montville - perfect for breakfast, lunch or afternoon tea

The rest of the Saturday was spent walking the Montville main street of shops.

I do love the quaintness of Montville and no matter where you drive, there is a view to enjoy.

Rather than eat out for dinner, we ate a bigger lunch and had cheese platters for dinner.

Fire pit with cheese platter

Fire pit at dusk Montville

Saturday night we relaxed by the fire pit outside, watching as the noon sky turned to dusk to a starlit sky. A bottle of bubbles was gifted to us for our stay for our special weekend away, which somehow got missed in translation as being a babymoon, rather than our 18th wedding anniversary. It gave us a good giggle.

If you are looking for a romantic getaway to Montville, do check out Lovestone Cottages. Our stay was relaxing and it was the perfect location for our anniversary.

Fire and bath

Other Weekend Getaways

A Guide to Growing Herbs Indoors

0
A guide to growing herbs in the kitchen

Seeing pots of green on my kitchen bench makes me happy. Growing herbs indoors can be a simple way to add ‘greenery’ to your kitchen. It’s also practical for cooking as there is no need to go to the garden to pick fresh herbs when you have them in arms reach.

Growing herbs indoors

But, growing herbs indoors can be tricky and I’ve had my fair share of failed attempts at keeping my herbs healthy.

I thought I’d share my successes and failures with growing herbs on my kitchen windowsill.

Despite the withering death of some herbs, there are some herbs that I’ve been able to grow all year round. There are tricks to keeping your herbs healthy so they can have the best chance to thrive.

Herbs growing on a kitchen windowsill
Herbs I’ve had growing on my kitchen bench in the past

Location for growing indoor herbs

The kitchen window is an ideal area to grow herbs because it offers maximum filtered light, which is essential for your herbs to grow.

Consider areas in your own kitchen that get a lot of sunlight as this is necessary for optimal growth.

If you don’t have any light that filters into your kitchen, make it a habit to take your potted herbs outside to get direct sunlight.

Herbs that can be successfully grown indoors

  • Basil
  • Chives
  • Parsley
  • Edible Flowers
  • Rosemary
  • Oregano
  • Thyme

Herbs that have died on my kitchen windowsill

  • Coriander
  • Dill
  • Mint

What you need to plant your herbs

Seedlings from your local nursery, potting mix, a pot and saucer are all you need to plant your herbs.

If your pot doesn’t have a drainage hole at the bottom, you can add stones to the bottom for drainage.

Watch for when your outdoor herbs flower – like basil. When the flowers turn brown, these can be seeds that can be planted into a pot.

When a herb dies in a pot, I will go out to my vegetable garden and notice any seedlings that have started to sprout and transplant them into one of my pots. It saves money going out to buy seedlings and it helps me use up existing supplies from the garden.

The success of growing herbs on your kitchen windowsill will be due to a combination of these factors

  • The amount of light they get – early morning to midday light is great.
  • How often they are watered – only water at the soil, not the leaves and do it each week, first thing in the morning. Always check the soil if you live in an air conditioned environment as this can dry out the soil quicker.
  • Drainage of the soil – herbs don’t like to have their roots sitting in wet soil.
  • How often the leaves are trimmed – this is easy to do if they are being used for cooking.

herbs on the kitchen windowsill

My herbs have been planted in pots that don’t have drainage holes. I have put a layer of gravel/stones at the bottom of the pot and have used potting mix and cacti mix to allow for adequate drainage.

herbs on the kitchen windowsill
From the outside looking in

Have you tried growing herbs on your kitchen windowsill? Got any tips to share?

5 Things To Consider Before Purchasing a Portable Fire Pit

0
portable fire pit

A portable fire pit is a practical choice for the backyard when you don’t want to have a designated fire pit area, all year round.

In Brisbane, winter is quite mild and more people would opt for a pool than a fire pit due to the climate so a portable fire pit is ideal.

portable fire pit brisbane

There are some points to consider before purchasing a portable fire pit. Here’s what you need to check before you purchase one for the backyard.

1. Check for fire bans before you fire up

It’s important to check with your local council or shire on the regulations around fires on your property. Most councils will allow a BBQ or similar appliance for lighting a fire. But always check before you light up – especially if you’re in an area where a fire prohibition has been put in place. You can’t light a fire pit in a fire banned area.

If you reside in Brisbane, you can light a fire in the backyard providing

the fire is used to cook food for human consumption in a barbecue or similar structure (but not a fire on the ground)

2. Control the flame and smoke

It’s important to control the flames and smoke emitted from the fire pit. Don’t stoke the fire to create large flames. Also remember, you cannot cause a smoke nuisance to your neighbours and you can be fined if the smoke is excessive. Manage the flame by only burning seasoned dry firewood.

3. Position in the open air

A fire pit should be exposed out in the open air to allow for the escape of smoke and for safety. Fire pits emit a bit of mess, so an open, paved or gravel area in the yard is ideal. Ensure its level ground to avoid the fire pit spilling out onto the ground.

If you position on the grass, use pavers or bricks to protect the lawn from scorch marks. You can get fire pits with stands so they don’t sit on the floor.

Don’t position the fire pit where there are overhanging branches or trees in case they catch on fire.

terracotta fire pit on paved outdoor area of modern home
Photo by AILDM

 4. Ensure adequate seating

Most people like to gather around the fire pit, so having chairs in timber or outdoor furniture that can withstand the elements outside are ideal.

Open fire pit with timber log seating in backyard
Photo my Fig Landscapes

5. Supervision is a must

Kids love sitting around a fire and roasting marshmallows or damper on a stick. For a deliciously sweet dessert, you MUST try these Tim Tam S’mores.

Tim Tam S'mores

Even though our fire pit is heat resistant, safety needs to be considered around fires.

Adult supervision is a must around fire pits. It’s also important the fire is well put out after use. Be sure to check for embers and use water to put out the fire.

adult supervision around fire pits

We got our fire pit from Bunnings for $89 during the pandemic 3 years ago. Fire wood is available also for purchase for around $15-$20 per bag.

If you go on a country drive, you may be able to pick up bags of firewood from locals in the area.

If you want a fire pit for your yard this winter, here are some I found online. Most are on sale, and prices can be found when you press on the link.

Portable Fire Pits

budget friendly portable fire pits for the backyard

  1. Markoe Outdoor Fire Pit
  2. Fire Pit Brazier BBQ on legs with grill and mesh lid
  3.  Phoenix Steel Fire Pit
  4. Marrakesh Black Fire Pit
  5. BBQ Grill Smoker Outdoor Portable Fire Pit
  6. Steel 40cm Diameter Fire Pit
  7. Grillz Fire Pit Outdoor Table Charcoal Fireplace
  8. Grillz Portable Fire Pit Bowl

Do you have a portable fire pit you bring out each winter? What’s your favourite thing to do around the fire pit?

Disclosure: There are affiliate links on this post. Should you choose to purchase an item, I will receive a small commission at no extra cost to you. All prices and availability are valid at time of publishing.

2023 Bathroom Trends in Australia

0
2023 bathroom trends in Australia

These 2023 Bathroom Trends in Australia are going to create bathrooms with wellness and self-care in mind.

If 2023 is going to be the year to renovate your bathroom, this post will give you all the inspiration you need to design a wet space with current and emerging trends.

Check out what is going to be popular for 2023 Bathroom Trends in Australia.

2023 Bathroom Trends Australia

Colour

Colour in the bathroom is going to go beyond accessories. 2023 is the year that will embrace colour through tiling and fixtures, using tones that will create a calming and tranquil space.

Curves and Straight Edges

In 2021 and 2022 we saw curves become the predominant shape of choice in the bathroom, but in 2023, we are going to see the best of both worlds with a mix of straight and curved lines.

This bathroom by On the Ball Bathrooms shows how to balance this trend through the use of round tapware and rectangular fixtures.

White, timber and gold bathroom with shower niche and wall mounted tapware.
Image by On the Ball Bathrooms

Vertical Tiling

Vertical tiling will elevate your bathroom and make it appear more spacious than it is.

Whether you choose KitKat tiles or stack your Subway tiles vertically, this trend is one that will stick around for 2023.

The illusion of space is still a goal for many renovators and the way to elongate a cramped bathroom is to tile from floor to the ceiling.

Bathroom Ledge

A ledge in the shower has been popular due to its simplicity in design, offering a minimalist storage solution.

But the emerging trend for 2023 is to extend the ledge beyond the shower behind the bath, vanity and even the toilet. The ledge lends itself to being the ideal way to install a concealed cistern.

Shower ledge along the back wall of the bathroom. Black and white terrazzo tiling on the floor and wall. Matte black tapware.
Image by Jess Hunter Interior Design

Stack Mixed Tiles

Can’t decide on which tiling you want in your bathroom? Why not mix both by splitting the bathroom with contrasting tiles for an incredible visual effect. The terrazzo and Kitkat tiles work cohesively to create this on-trend bathroom.

Terrazzo and Kitkat tiling in the bathroom - bathroom trends in Australia 2023
Image by King Homes NSW

Wall Mounted Tapware and Fixtures

Lifting the vanity and toilet can create the illusion of space in the bathroom. Wall mounted tapware and fixtures are going to be the installation of choice for 2023.

The benefits of space saving are certainly alluring using wall mounted fixtures and tapware. They’re also easier to clean. It also provides a minimalist and contemporary look and removes the risk of burst flexi hoses, which have become widespread under bench mounted tapware.

Wall mounted mixer with spout through bench
Image by Zooi Design
Wall mounted basin wall mounted vanity with gold tapware
Photo by Abi Interiors

Shower Experience

Don’t have much space in the bathroom and need to choose between a bath or a shower? Choose the shower and make it a spa-like experience.

Incorporate a Rain head shower and Hand-held shower to integrate relaxation for a day-spa experience.

Luxurious shower
Image by Studio Esar

Bathroom Taps and Fixtures Still in Style

Wanting to know what is still trending for 2023 in Bathrooms? This list will help with your selections.

Other Bathroom Trends in Australia Posts

12 Ways to Update a Rental Bathroom

0
12 ways to update a rental bathroom

If you’re looking for ways to update a rental bathroom for little cost, these tips will come in handy.

Rental bathrooms aren’t always the renovated retreat you’d love to immerse in. And if you’re spending more time at home, it’s going to become paramount to getting the bathroom looking less blah and more ahhh.

Check out these inexpensive hacks to make the most of your rental bathroom. Always check your written rental agreement and get the ok from your landlord before you make any updates.

12 ways to update a rental bathroom

1. Don’t paint over the tiles or floors

Even if the tiles are ghastly, don’t be tempted to paint over the tiles. The paint does peel over time and this will make it look worse than it is. Camouflage instead with waterproof rugs or a bathmat. Check out these fab bathmats that can add colour and fun to your bathroom.

2. Clean the grout

Grout can inhibit mould. If you want to remove the spots of mould, use clove oil as this will kill the spores and then use a mould cleaner which will remove the spots. I’ve tried various natural cleaning products to remove mould and the process I’ve outlined is what has worked for me. Obviously have good ventilation and the appropriate PPE when cleaning with mould cleaners.

3. Change the shower head

If you have an all-directions shower rose, consider cleaning it or changing it for new. This is an inexpensive way to update the shower.

4. Change the tap buttons

If the hot and cold buttons on the taps look a little yellow, you can replace these for little cost.

5. Change the floor waste grate

Not all floor waste grates can be changed as it can depend on their diameter. Measure the diameter and order in the size you need. I can guarantee this makes a world of difference to the floor of the bathroom.

6. Paint plasterboard walls and ceiling

If you have approval to do so, paint the plasterboard walls and ceiling. Use a paint suited to bathrooms. This improvement alone can change the bathroom greatly.

7. Change the toilet seat

A new toilet seat can update an existing toilet instantly. Just check on the installation type and replace with like for like.

8. Change lighting

Swap the fluorescent lights to cool light bulbs. This can impact the light in the room significantly.

9. Style with linens

Soft furnishings like hand towels and bath towels can add colour and texture to the bathroom.

10. Update bathroom accessories and soap holders

Don’t drill into the walls to update the bathroom accessories like caddies and soap holders. Use suction accessories like Fusion-Loc to organise your bathroom. These can be taken with you if you ever move out.

11. Replace the shower curtain

If the shower curtain is mouldy, you can get it cleaned. If it’s faded, replace it with a new design. Kmart has some affordable shower curtains to consider.

12. Add some plants

Plants always update a bathroom instantly. They really do. Don’t get too carried away. Check out these ways to add plants to your bathroom.

How have you updated a rental bathroom? Got any tips to add?

What Are Gradual Water Leaks?

0
Gradual Water Leak

Gradual water leaks can occur in any home.

The cause of the leak can vary, but they are most common when a pipe, gutter, valve, fitting or appliance has gradually deteriorated.

An indicator of a gradual leak can be determined by the age of the home and product, but sometimes it can be a workmanship error, faulty part or the item (or adhesive) is simply towards the end of its material life.

What is a gradual water leak?

A gradual water leak is when water (potable or wastewater) constantly drips, sprays, trickles or flows from an item. The ongoing release of water escaping the item is what is classed as a gradual leak. It’s not a sudden burst, however a gradual leak can lead to a sudden burst.

Sometimes a gradual leak can be a hard leak to locate as they can be concealed underground or within the walls or ceiling of your home. However, there can be some vital clues which may indicate a gradual leak has occurred before damage appears.

Where do gradual water leaks commonly occur in the home?

Any pipe connection – whether it’s a waste or water pipe can produce a gradual leak. But there are common areas of the bathroom and kitchen where a gradual leak can occur. Here are the most common gradual leaks.

oxidisation on a copper pipe indicates moisture and is considered a gradual leak
Oxidisation on a copper pipe indicates moisture and is considered a gradual leak
  • Shower combination – generally on the tee piece connection to the hot and cold water tap. These are the pipes behind the shower wall.
  • Bath combination – on the tee piece behind the tiled wall connection bath taps and bath spout
  • On a crimped or welded copper pipe joints (water line)
  • On a PVC trap connection under a basin or sink (waste line)
  • Brass thread for water connected appliances like dishwasher or washing machine – sometimes the connected hose is not tightened enough or cross-threaded at installation
  • Shower and/or bath waste – where the grate waste doesn’t connect correctly to the puddle flange
  • Flexi hose connections which have been cross-threaded
  • Poly pipe connectors – usually underground connecting water from your water meter to your house
  • Rusted valley gutters or quad gutters on the exterior of the house
  • Broken down or blocked downpipes
  • Cracked Earthenware pipes – installed on home sewer lines pre 1980’s
  • Dishwasher and washing  machine hoses where the perforated hose has split

How can you identify a gradual leak?

Sometimes, you won’t realise there is a gradual leak in your home until

  • Water stain marks appear on the ceiling or plasterboard walls.
  • Calcium stains or efflorescence marks on concrete or tiles.
  • Skirting pulls away from the wall and starts to swell or rot.
  • Cornice in the ceiling pulls away and swells/dips from the moisture.
  • Visible Mould spores
  • Timber floorboards start to stain and rot.
  • Vanity or kitchen cabinetry starts to swell.
  • Cabinetry kickers swell or pull away from the cabinetry.
  • Tiles and grout start to pull away from the wall.
  • Silicone goes mouldy.
  • Swampy/very green grass in the front yard.
  • Cracks or structural damage occurs in the home.
  • Green oxidization can be seen on copper pipes and connections in accessible areas.

When these damages occur, it will require investigation by a plumber. Your plumber will need to complete a leak detection test at your home to locate the leak and fix it for you.

Before the damages appear, there may be some ways to discern a leak has occurred:

  • Compare your water bills. If you have a high-water bill from last quarter is it because you have used more water or could there be a leak at your home?
  • Check your water meter. If the dial on the water meter is spinning and no one is using water in the house (don’t forget to consider washing machine or dishwasher use) this could indicate a leak.
  • Touch test the cabinetry in the kitchen and bathroom and check for any moisture. The weekly clean of those areas can be a good time to do a touch test.

Unfortunately, some leaks just won’t be found until the damages are visible after a period of time as the pipe will only leak when the tap is turned on and water is running through it.

Common examples of these are

  • If the leak is the pipe connecting to the shower rose. It won’t leak unless the taps are turned on.
  • Or on a dishwasher or washing machine outlet hose. The water won’t leak until the appliance is used.
  • Waste leaks won’t occur unless water drains down the pipe.

Gradual leaks will usually be an exclusion from insurance (always check your PDS though) as they will occur on items that have usually reached the end of their material life or have gradually deteriorated. Depending on the location of the item leaking, they can be retightened or replaced to prevent further damage.  Corrosion, oxidization and rust are common causes to gradual leaks and is an indication the item is reaching its material life.

Regular maintenance and checks around your home are vital.

Owing a property requires an investment of time and money to maintain and there comes a point when parts of the house will need to be replaced at an owner’s expense. The bathrooms, kitchen and laundry will need to be renovated due to age. Or the sewer pipes in your home will need to be upgraded from earthenware to PVC due to ground movement cracks, or gal water pipes will have rusted so much inside and the water pressure so low, it will force you to replace them with copper or PEX.

This is why when renovating any bathroom, kitchen or laundry in your home, it is recommended to replace the pipes in the wall and floor. It’s an incredibly frustrating experience to repair a leaking pipe behind a newly renovated bathroom wall.

Ensuring you use a reputable plumber to repair leaks when they occur can prevent further damage from occurring. It would also be wise to get your plumber to do these additional checks to make the most of their call out fee.

Other Posts about Leaks to Check out

Meet Our Labradoodle Puppy: Maisie

0
Black labradoodle puppy on white and black rug

Meet our Labradoodle Puppy Maisie. She’s brought so much joy and mischief to our household. She’s already a much-loved pet to our family!

It’s been 6 years since we have had a dog in our household.

We were all devastated when our first dog Bentley had to be put down. He was a loyal pup who was our ‘first baby’.

He was there through all my pregnancies and morning sickness. He was also very protective of each baby we brought home. The girls have recollections of “BeBe” stealing their food.

I will never forget the day Bentley flipped a freshly baked banana cake off the kitchen bench and licked the cake tin clean.

Bentley’s portrait hangs in our living room, a visual reminder of a much-loved companion to our family.

We hadn’t actively looked for an additional pet after Bentley as our household was crazy with 3 young kids. I already had enough noise and mess to sort out and I wasn’t keen to add a puppy to the mix. Plus, there was the financial cost of owning a dog.

But now the girls are older and Jacob works permanently from home, we actively started looking. We didn’t need to look too far because through a friend of a friend, we were able to meet Maisie.

Maise on the green lawn

The girls didn’t know we were getting a puppy until we brought Maisie home.

Family holding Labradoodle puppy

She’s a Labradoodle and the cutest little pup.

Even though we had wanted to get a male dog, Maisie chose us when Jacob and I went to look at the litter. And we couldn’t not choose Maisie due to her even balance of placid yet playful nature. Maisie has slotted into family life quite easily. It’s like she was meant to be.

Maisie having cuddles

I can’t wait to see what adventures will unfold with Maisie. 
Puppy in a beanbag

As you can see, she’s settled in well. The bean bag has been a favourite spot to snuggle into for day naps.

But I will need to remove the cushions and throws and get into the habit of putting away shoes and bags as they will be fair game for Maisie.

How to Reduce the Likelihood of a Burst Flexi Hose in Your Home

0
burst flexi hose which is rusted and needed to be replaced

A homeowner never forgets when a burst flexi hose damages their property. Here’s how to reduce the likelihood of it happening again. 

Burst flexi hoses are becoming a big problem to Australian properties and many home owners are unaware of their danger.

If you’ve ever had your toilet or tapware replaced in the last twenty years, you will find the water feed has been replaced with a steel braided hose. This hose has the potential to burst, causing serious water damage to your home.

In fact, if a burst flexi hose isn’t discovered within 24 hours, it can release enough water to fill a household swimming pool. This type of water damage can lead into the tens of thousands of dollars to outlay for the repair and it may no longer be insurable.

Six years ago, I wrote a post on a valve I reviewed in my own home which would stop the flow of water the moment a flexi hose burst. Unfortunately, the blog post had to be brought down as it is no longer manufactured.

While there is a market for such a valve to be made available, it’s important to prepare and understand how to reduce the likelihood of a burst flexi hose in your home.

The first step is identifying where you have flexi hoses installed throughout your property.

Where are flexi hoses installed in your home?

Here are the key areas to check if you have braided flexi hoses installed in your home

Once you’ve identified where flexi hoses are installed in your home, learn how to reduce the likelihood of a burst flexi hose in your home.

burst flexi hose from under a basin
An image of a burst flexi hose. When the steel braid rusts/corrodes, it causes a weak spot on the hose and the inner rubber tubing bursts.

Test the water pressure to your home

Get your local licensed plumber to test the water pressure to your home. The installation of pressure limiting valve can be a preventative measure to reduce water pressure to all the fixtures in your home.

Water bill reminder to check your hoses

Every time you receive your water bill (for most households it is quarterly), make it your reminder to check all the braided hoses in your home. If any of the hoses have rust, corrosion, are kinked/twisted or have frayed steel threads, get your plumber out to replace asap. These deteriorated flexible hoses are a burst waiting to happen.

Replace flexi hoses every 5 to 10 Years

Replace your braided hoses every 5 years or earlier if signs of wear can be seen. The general consensus amongst plumbers is to replace every 5-10 years.

Remove all chemicals and cleaners from Cabinetry

Keep cleaners and chemicals away from your flexi hoses as this can cause premature wear and reduce the lifespan of your flexi hoses.

Install an isolation tap to every water point with a Flexi Hose

Ensure every flexi hose has its own isolation tap. If you replace a flexi hose in your home, get your plumber to install an isolation tap. This will allow you to isolate the water to that flexi hose which can save time if it ever bursts.

Relying on the water meter at the front of the house can take up precious minutes causing further water damage. Make it easier on your future self to have a stop tap on each flexible hose connection.

This can also be of benefit if the flexi hose bursts in the middle of the night.

Test your water meter tap

Most people don’t check their water meter unless they’ve received a high water bill or need to turn off the water for an emergency. If you have a burst flexi hose, it’s the worst time to discover your water meter is difficult to turn off or fails to isolate the water to your home.

Install an additional water stop valve into your property

If your plumber has installed stop taps to all water connections in your home, there may be no need for an additional stop valve. But if you haven’t got individual stop taps, consider getting your plumber to install a ball valve in an easy location. This can help to isolate water without relying on your water meter.

Turn off water when heading away

When you head away on holidays, turn the water off to your property. This will prevent arriving home to unexpected water damage while you’re away.

What to do if your water meter doesn’t turn off and you have a burst flexi hose?

If you are in the unfortunate predicament where you can’t isolate the water to your home:

  • Is it the hot water flexi hose that’s burst? Turn off your hot water unit as this will isolate the hot water feed.
  • Is it the cold water flexi hose that’s burst? Turn on the hose tap at the front of your property – this will ease the flow of the cold water feed to your burst flexi.
  • Call an emergency plumber as soon as possible.
  • Advise your insurer and keep the flexi hose to present to the assessor. If there is any rust or corrosion on the hose, it may not be covered by insurance. You may also not be covered if you can’t provide the flexi hose for assessment.  Check your exclusions under Escape of Liquid events in your insurer’s Product Disclosure Statement.

The damage caused by a burst flexi hose can be a costly inconvenience. You can certainly reduce the likelihood by following the simple measures above.

Disclaimer: This post was originally published February 2022 and has been updated with new information. The information is intended to be of a general nature only. The Plumbette does not accept any legal responsibility for any loss incurred as a result of reliance upon it – please make your own decisions and enquiries to suit your household.

DIY Christmas Decorations You Can Make With Kids

0
DIY Christmas Decorations You can make with your kids

Here are 12 DIY Christmas Decorations you can make with kids. They’re easy and fun to create and will add some Christmas cheer to your home.

Christmas decorating can be fun for all members of the family when they get involved.

Kids love getting crafty and helping decorate the tree with their creations.

I think part of what makes Christmas fun is the preparation, and decorating certainly builds up anticipation for the big day.

Here are 12 Easy DIY Christmas Decorations you can make with your kids. Some also make affordable gifts to family and friends.

Happy Crafting!

DIY Christmas Decorations

DIY Christmas Decorations you can make with kids

Nutcracker Peg Decoration

This was a fun craft to make! These Nutcracker Peg Decorations are so cute and are the perfect way to hang Christmas cards.

Star Twig Decoration

Such a simple decoration using sticks from the backyard. This star can be used as decor on a console for a bush inspired Christmas.

Bush stick star decoration

Toilet Roll Christmas Trees

I can’t not share a toilet roll related craft on my plumbing blog! I remember making these trees with my girls when they were younger. Very easy and fun to make for little hands to handle.

Toilet roll Christmas Trees

Boho Felt Trees

All you need are some styrofoam cones, felt and pom pom garland to create these trees. You can add a pom pom on the top as the star.

Felt Christmas Trees

Christmas Cupcake Liner Garland

This garland is easy as it uses cupcake case liners folded into trees. Attach to string and your have a garland ready to hang.

Christmas tree garland

Gum Nut Gnomes

This craft is cute and simple. You will need to gather gum nuts to make these gnomes. Paint the gum nut and add the pom pom nose and cotton beard.  These can look sweet on the Christmas table.

Gumnut Christmas Gnomes

Petal Baby Angel

Any types of petals can be used to create these angels. i used Illawarra Flame Tree petals to make these baby angels. The petals do dry over time, but still retain their colour.

Christmas angel petal baby decoration

Terracotta Pot Gingerbread House

This is a simple way to upcycle a terracotta plant pot. Add some glitter for sparkly effect.

Gingerbread House Terracotta Pot

Gumnut Baby Christmas Decoration

For a true Aussie twist, gather some gumnuts and turn them into Christmas babies – snug as a rug in a gum!

Gumnut baby Christmas Decoration

Snow Globe Gingerbread House

You can make your own gingerbread house or buy one made. Place in a jar with caster sugar and you have a snow globe.

Gingerbread House Snow Globe

Christmas Bear Baubles

The kids LOVE these baubles. All you need is a bauble, pom poms and eyes to create these cute bears the kids can then hang on the tree.

Christmas Bear Bauble

Stick Tree Christmas Decoration

Get the kids outside to gather some sticks to make these tree decorations.

Stick tree Christmas Decoration

Other Christmas Ideas


Our Girls Weekend at Silhouette Cottage Sunshine Coast

0
Girls Weekend at Silhouette Cottage Sunshine Coast

A few weeks ago, I went away for a girl’s weekend at Silhouette Cottage, Sunshine Coast’s award-winning luxury accommodation.

Girls Weekend at Silhouette Cottage Sunshine Coast

I have to thank Jacob for finding this gem of a spot to stay at. Much research was done to find the perfect place where we could relax and unwind.  When we finally settled on a date, Silhouette Cottage was free for that weekend. Cindy (business owner) made the whole process of booking so easy!

The property is 5-star luxury.  Everything at the cottage is well thought out and provided for. Even down to the marshmallows for the fire pit and Tim Tams for your arvo cup of tea or coffee.

We arrived late on the Friday night after delays with getting away from Brisbane. But the moment we walked through the door, we all knew we had booked somewhere special.

Next morning at Silhouette Cottage
View from the kitchen

There was chilled Prosecco in the fridge and a freshly baked loaf of bread on arrival which we devoured out on the deck.

Silhouette Cottage is best suited for 4 people, as there are two bedrooms, each with their own ensuite and incredible view. I’m sure it can cater for more if you check before booking.

Morning at Silhouette Cottage
Saturday morning

Some of my must haves for finding accommodation was it had to be luxurious (tick) comfy beds (tick) and needed a deck that opened to a glorious view for talking and relaxing (double tick!).

Silhouette Cottage View from the deck

The outdoor freestanding black claw bath below the cottage was an experience in itself. I made good use of a late Saturday afternoon soak after purchasing some bath bombs from Eumundi markets. I did feel a bit cautious about undressing in the open to get into the bath – especially when kangaroos are known to roam the backyard area… but I had nothing to fear.

Outdoor claw foot bath at silhouette cottage

An hour-long soak with a glass of wine in hand was divine. Mt Ninderry was in view and the vast greenery was all I needed to ground my mind after a busy week at work.

soaking in an outdoor bath with a mountain view

Located at Yandina, the accommodation is the perfect base to explore the Sunshine Coast. We spent a day at Eumundi Markets on Saturday and then stayed the night in, devouring a cheese platter for dinner.

Cheese platter for dinner
Cheese platter for dinner out on the deck
Outdoor deck area Silhouette Cottage
Where we had breakfast and dinner here on the deck

It was a shame to leave on Sunday morning, but the relaxation continued with an hour-long hydrotherapy session at Spa Anise Spicers Tamarind Maleny.

Stunning Hydrotherapy Treatment at Spa Anise

The magnesium salts certainly worked their magic on our weary bodies. I want to go back and enjoy a kid-free weekend there. The surroundings are lush with rainforest goodness.

Girls weekend away

Another day was spent browsing shops at Montville and we had lunch at Poet Café. This cafe is sentimental to me as this was where Jacob and I had lunch after he proposed 18 years ago.

If you are based in QLD and looking for a girls’ weekend away on the Sunshine Coast, definitely book Silhouette Cottage.  You won’t be disappointed and probably won’t want to leave.

Other Travel Posts

When You Can’t Afford an Emergency Plumber Call Out

0
when you can't afford an emergency plumber call out

If you face an unexpected plumbing problem and can’t afford an emergency plumber call out, here are tips on how to proceed.

Times can be tight with the cost of living increases putting a strain on family budgets.  An emergency call out may be the last thing you need. Unfortunately, it can occur right when you can’t afford it.

afford emergency plumber call out

The purpose of this post is to equip you so you can identify what is an emergency, and what is not. I will give you tips on ways to manage the problem until your next pay or until you can afford to get a plumber out.

Some plumbing problems should not be ignored though and will require an emergency plumber call out. In this instance, it’s best to plan now how you can manage an emergency call out bill.

  • Does your preferred plumber have an after pay or payment plan facility?
  • Do you have a Home Assist option through your insurer? The annual cost for this is often 1/3 of the price of an initial call out. Check that plumbing is one of the trades offered. Usually there will be a wait period before you can access this when adding to your policy.
  • Can you access an emergency savings account?
  • Could you pay with a credit card?
  • Can a payment plan agreement be made with your plumber?
  • Can you borrow money from a family member or friend? (worst case)

It’s a stressful predicament to not have money spare to pay for an unexpected bill, but allocating a small cash reserve for emergencies now can give peace of mind in the future.

Not all plumbing jobs will require immediate attention. Here are tips on determining your plan of action.

Tip 1: Can the problem be fixed without a plumbing license?

The plumbing trade is protected by a plumbing license so by law, plumbing repairs should be done be a licensed plumber.

But some jobs don’t require a license to fix. For example changing a tap washer on a leaking tap or replacing the faulty shower rose.

Anything to do with repairing pipework or servicing an appliance or fixture should be done by a licensed plumber.

While there are many DIY articles and YouTube videos which can show how easy it is to fix a problem, you are also inviting these unexpected costs into the scenario:

  • Denial of a home and contents insurance claim and/or cancellation of your home and contents insurance due to unlicensed plumbing work – read your PDS for exclusions.
  • Loss of warranty on the tap/fixture/appliance.
  • Further damage to your property due to a poor fix-up job.
  • Fines for carrying out unlicensed plumbing work.
  • Liability issues if what has been repaired causes harm to another person and/or their property.

If you’ve determined the problem needs to be fixed by a plumber, head to the next tip.

Tip 2: Recognise if it’s a plumbing emergency

Not all plumbing problems that occur outside of business hours (on weekends, public holidays or at night) are an emergency.

Most times, the plumbing problem can be isolated or lived with for a short time until the next business day.

This can save you after hour call out fees which can be more expensive than a call out during business hours. However, after hours call out fees are to be expected as they cover the out of hours inconvenience for a plumber to come to your property.

The plumbing jobs which would be classed as an emergency are

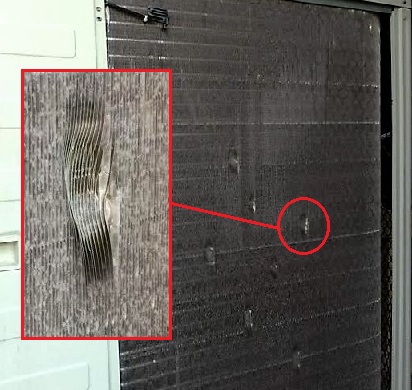
  • Water leaks which cannot be isolated from an isolation valve, water meter or tap
  • Sewerage overflows in the house or through the overflow relief gully. This is a matter of health and safety to get this blockage cleared and cleaned as soon as possible.
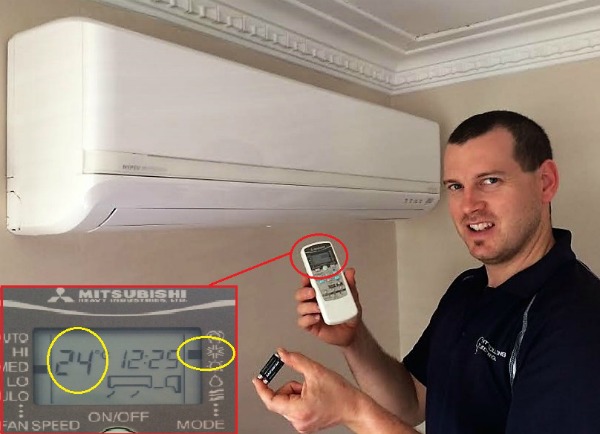
  • Hot water supply – although this can be lived with for a short while depending the season.

Tip 3: Know where to turn the water off

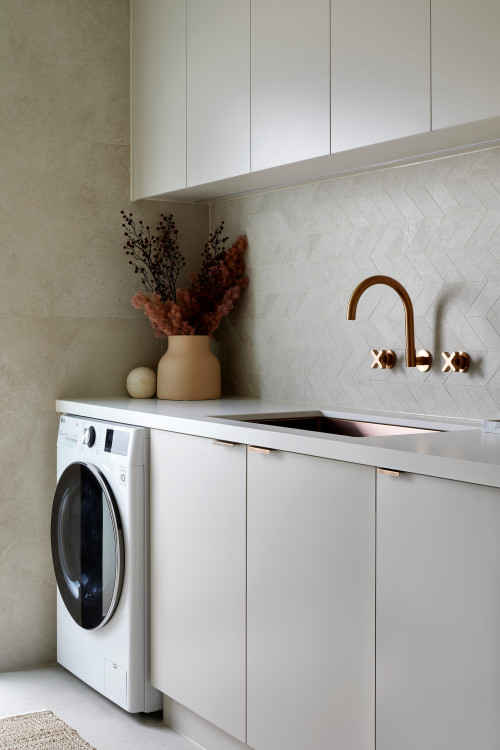
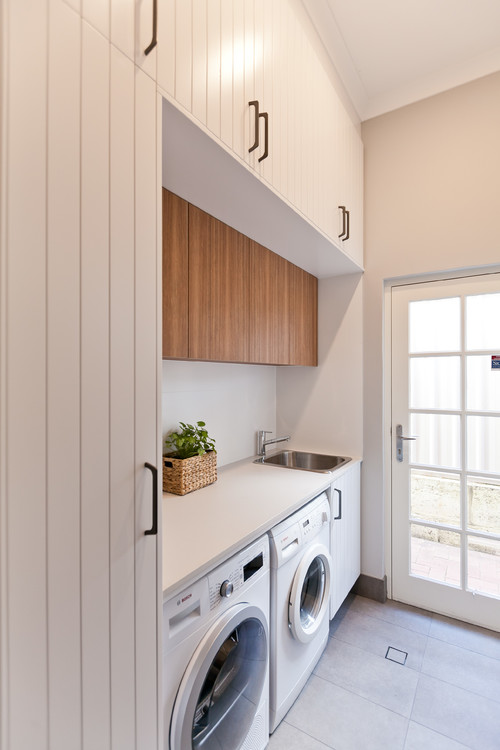
It’s mighty convenient for every tap and fixture in the house to have its own isolation tap. This can make it easy when isolating the water directly to the problem fixture.

If the taps/fixture/appliance can be isolated, you can put off the repair until you can afford to get it fixed, providing you can live without it for a short time, or have a spare to use in the meantime.

When your house doesn’t have isolating taps, you will need to isolate from the water main which will turn the water off to your property. Again determine if this can be lived with until the next business day.

The inconvenience of no running water to a home can prompt an immediate plumbing call out to rectify. Ask the plumber to install an isolating valve so the problem can be isolated in the future if it occurs again.

Tip 4: Identify how bad is the blockage?

When raw sewerage overflows from any drain or outlet in your home or from the ORG, this requires an emergency plumber call out to rectify. Raw effluent can not only damage your property but is also a health risk. It must be contained and the blockage attended to.

If you can only identify one fixture blocking up, it may be a blockage which can be fixed with a plunger or a natural cleaner.

When a number of fixtures won’t drain, this blockage needs to be fixed as soon as possible to prevent a backup or overflow of waste.

You may be able to determine the cause of a blockage and how it can be fixed by reading this post.

Tip 5: Is it your problem to repair?

Check the location of the plumbing problem to determine if it’s your problem to repair.

Any water leaks from your water meter and beyond towards the footpath are the responsibility of your water provider.

Most sewer blockages are a property owner’s responsibility though. If it’s beyond the property’s border, it will not be the home owner’s responsibility however this can’t be identified until a plumbing call out is made.

Blockages are often diagnosed using a drain camera. If the plumber identifies the blockage is in the infrastructure of your sewer network (not on your property), a call will need to be made to the sewerage provider to get the blockage removed as soon as possible.

Tip 6: Have a list of 24 hour plumbers you can rely on

Preparation is key when faced with a plumbing emergency. Not all plumbers work 24 hours. Have a list of local plumbers who offer this service so you can call when needed. It can be a good time to check what their payment terms are on an emergency call out too.

I always recommend using a Master plumber. For QLD searches, use this tool to find a master plumber in your local area.

How have you managed an emergency plumber call out?

Disclosure: This post is not intended to give financial advice, but simply tips to assist during an unexpected plumbing emergency. Please make the right decisions to suit your household. 


Is it Time to Replace Your Vent Pipe Flashing?

0
Is it Time to Replace Your Vent Pipe Flashing

As part of my day job, I review roof reports frequently. A common defect is the failure of vent pipe flashing, allowing water through the roof.

The weathering and gradual deterioration of the Dektite or rubber boot is often a widespread cause for roof leaks. If you’ve noticed ceiling damage from rainwater, chances are it’s the stink pipe flashing.

What is a stink pipe?

Every house will have a sewer vent pipe penetrating through the roof. It’s sometimes referred to as a ‘stink pipe‘ due to the odours it releases. The vent emits sewer gases to prevent them building up in the home and to balance the air pressure in the sewerage system.

Where is the vent pipe located in my home?

Your vent pipe, is usually located near the bathroom or toilet of the home. The pipe penetration has a pointed end shaped like an airplane nose. The penetration through the roof sheeting requires flashing to ensure water doesn’t seep around the roof opening at the base of the vent when it rains.

Dektite is a popular flashing used to keep the penetration watertight, but like all materials exposed to the sun and weather elements, it can deteriorate and require replacing.

new dektite flashing

When should you check your vent pipe flashing?

If you live in a single storey house with a pitched roof, you can do a visual inspection from the ground to see if your vent pipe flashing looks deteriorated.

A tell-tale sign is if you have water damage to your ceiling. This indicates the water has made its way under or through the flashing.

A yearly check can keep your roof water-tight

A visual inspection of our vent pipe showed it was overdue for replacement. Our home is 17 years old. The rain this year has caused the paint to swell on the toilet ceiling which was located directly under the vent pipe.

vent pipe flashing badly deteriorated
Terribly deteriorated vent pipe flashing

When the original rubber boot flashing was removed, the rubber was cracked. A new Dektite was purchased from Bunnings and it was sealed to the roof.

old vent pipe flashing cracked

Who should replace flashing on your roof?

Roofing is a specialist trade. Ideally, your roof should be inspected yearly by a licensed roof plumber, including the flashings around roof penetrations. Unfortunately, these inspections don’t occur until water stains appear on the ceiling which indicates a roof leak.

Keeping your roof water-tight is a homeowner’s responsibility and is a condition of home insurance.

replaced dektite roof flashing

Roof work, including replacing flashings, should be done by a licensed roof plumber. Safety is paramount when inspecting and repairing roofs. A homeowner may be able to do a perimeter inspection around a single storey house, but for a double storey property, it’s best left to engage with a licensed roof plumber.

Other Roof Articles

Store Stuffed Toys in a Bean Bag to Create a Toy Capsule

0
store stuffed toys in a beanbag

If you’re looking for a clever way to store stuffed toys, get a bean bag cover and fill it up!

fill a beanbag with stuffed toys

We have accumulated hundreds (well it feels like thousands) of stuffed animal toys over the years.

From birth to childhood and well into the tween years, my girls’ love of stuffed toys hasn’t waned.

stuffed toys in a bean bag case

Our collection includes the first teddy bear milestones, to the favourite ABC4Kids characters, to the plush toys won at the Ekka. There are plenty of memories attached to those toys.

While the toys can be donated, another way to store them is to stuff them into an empty bean bag case. All my girls’ stuffed toys are sitting in a bean bag in the living room. It’s now a time capsule of stuffed toys they’ve loved in their lifetime.

Even though it doesn’t have the same ‘sink in’ feeling as the Styrofoam balls, it’s eco-friendly as it prevents the toys from going to landfill.

Phoebe sitting on bean bag full of toys

What I love about our bean bag is it can still be filled as we cull the toys. It also means toys can be retrieved should they wish to play with them again. However, that’s not a regular occurrence because the point of storing them in the bean bag is to keep them out of sight!

store stuffed toys in a beanbag

If your home is overflowing with stuffed animal toys, purchase a bean bag cover and start filling it up. You never know, those toys kept hidden might make you a fortune one day!

Disclosure: There are affiliate links on this post. Should you choose to purchase an item through a link, I will receive a small commission at no extra cost to you. 

How to Deal With Conflicting Advice From Plumbers

27
how to deal with conflicting advice from plumbers matte black tapware

When you call a plumber to fix a problem, you expect the solution to be straightforward. But this is not always the case. Some problems require a process of elimination which eventually will lead to a solution. Here’s how to deal with conflicting advice from plumbers.

What types of plumbing problems require a process of elimination?

Believe it or not, there are various plumbing problems which require expertise in crossing out possible causes before the solution is found. The most common problems which require a process of elimination include:

  • Water hammer
  • Leaks
  • Blockages

Let’s explore these in better detail.

Water Hammer

Water hammer is caused when the water in your pipes change direction abruptly creating a reverberating banging sound through the walls or ceiling of your home.

Water hammer can be caused by a number of factors, and it will always require a process of elimination to fix the cause.

The most common ways to fix water hammer is

  • Ensure water pipes are fastened to studs in the walls with clips
  • Fit a pressure limiting valve at the water meter to reduce pressure in your water pipes
  • Replace tap washers
  • Choose soft close mixer taps
  • Install water hammer arrestors to compress the air pipes

Leaks

Leaks can be caused from a variety of sources in the home. Liquids can travel, and often the location of the damage is not always in the same position as the leak.

When water damage is noticed in your home, the best way to identify the cause is by getting a plumber to conduct a leak location inspection to pinpoint the exact cause of the leak.

Blockages

Blocked pipes can be caused by a variety of different items and can occur anywhere in your sewer pipes.

The best way to find a blockage is to hire a plumber with a drain camera to determine where the blockage is and provide a solution to get the pipes free flowing again.

But plumbing problems aren’t the only things you can get conflicting advice on. Plumbing trends are another hot topic your plumber may give an opinion on.

Dissuasion on plumbing trends

Chrome taps instead of matte black; Built-in bath instead of free-standing; Double shower instead of bath; Bench mount taps instead of wall mixers. Plumbers will have opinions over your renovation and may sway you to go against what you’ve chosen.

Plumbers are usually the trade that will come back to do maintenance so they will have an opinion or two about your plumbing choices.

Go with what you love, consider the pros and cons and stand by your final decision. You’re the one who has to live with the design, after all.

How to deal with conflicting advice from plumbers

When you have plumbers giving conflicting advice, it can be confusing and frustrating. It makes it hard to know who to trust and stirs up fear on spending money unnecessarily.

There is no harm in getting a few opinions, but also understand, plumbers are giving advice from what they see and what they have experienced before. Not all plumbers are right and not all suggestions are going to be wrong. It helps using a licensed plumber that is trusted in the community to ensure you’re getting the right advice for your plumbing needs.

An Unused Verandah Renovated into a Stunning Cottage Styled Sunroom

0
stunning cottage styled sunroom

Do you live in a Queenslander and have an unused verandah in need of an update? Be inspired by this renovation project by Bay-Lu Properties. The duo renovated their parents’ unused verandah into a stunning cottage styled sunroom which can be enjoyed all year round.

verandah turned into a cottage style sunroom

Bay-Lu Properties is run by the very clever, builder-designer couple, Joel and Nola. They are the Aussie version of Chip and Joanna Gaines.

For over a decade, Joel and Nola have been flipping houses, focusing on renovate to sell projects. In recent years, they have started to renovate for family and offer design consultations.

This verandah revamp was done on a cattle property in Liston, 15 minutes east of Stanthorpe.

Sunroom Brief

As the winters are chilly and the eastern wind really does bite in this part of country NSW, the project brief was to revamp the verandah into a sunroom.

Before verandah conversion to sunroom

The space needed to make the most of the sun and stunning outdoor landscape, but also offer protection from the gusty winds.

Verandah before a revamp
Verandah before

A list of features included lots of windows to let the sun in and feel connection to the outside landscape.

There was also a ‘must have’ request by the owners, to include a bench seat to fit a large family so all adults could sit and enjoy the space.

Cottage Styled Sunroom

Joel and Nola went about building in the verandah to create a sunroom. A corner bench seat was designed to meet the brief, positioned below a row of windows to let the sunlight in.

verandah converted to a sunroom
After, before the styling

To tie the sunroom in with the aesthetic of the rest of the house, which is quintessential country cottage (think weatherboards and dormer windows and a wide wrap around verandah), the duo sourced a mixture of picture windows, sliding windows and sliding doors with grids. The timber floating floors from Andersons add to the farmhouse look.

sunroom cottage styled

The space was styled using pre-owned furniture from the owner, layering a few new scatter cushions. The wicker chairs are from Harvey Norman, which are for outdoor use as the sun hits hard on this space.

outside view of verandah converted to a sunroom

The sunroom has now become a much-loved retreat seating 8-10 adults, with a kid’s zone play area (which is out of shot) to maximize the best use of the space.

A large coffee table offers a functional surface for board games or colouring in while the adults can sit back, drink coffee and do Australian Sunday quiz. Apparently, it’s a family tradition taken quite seriously!

Stunning cottage styled sunroom in Stanthorpe
After

The before and after of this space is stunning. One can only dream of relaxing in a space like this on their next country escape!

For more inspiring before and after renovations, follow Bay-Lu Properties on Instagram. If you need a hand with designing your space, message Nola via Instagram for a consult.

Five Air Conditioning Maintenance Tips

2
air conditioning maintenance

Spring is the ideal time for air conditioning maintenance. These tips from my trusted electrician will ensure your air conditioner works optimally for summer. 

If there is one guarantee every Australian summer delivers on, it’s the heat.

Some parts of Australia experience sweltering heat and in Queensland, the humidity can make it feel even more unbearable.

We rely on our ducted air conditioner every summer to help us get through the heat comfortably. But such an appliance also requires maintenance to ensure it runs optimally when it will be used the most.

My electrician sent a newsletter sharing ‘5 Secrets of Air Conditioner Maintenance’. I loved the advice and pictures in the newsletter I asked if the tips could be shared on the blog.

If you are after a reliable electrician in Brisbane, Stewart from Bright Solutions Electrical is who I recommend.

When it comes to air conditioning, you want your system to be able to work during peak time in summer. It’s really important to get your air conditioner serviced every year and spring is the best season for a maintenance check.

It prolongs the life of the air conditioning unit and often will prevent a problem occurring later on.

5 Air Conditioning Maintenance Tips

1. Check the remote control

Ensure the remote has new or working batteries, then ensure the setting is for cool and the temperature is set to 24°C. The system is the most energy and cost efficient when on this temperature setting. Also, if your unit has a dehumidify or dry setting, this will remove the humidity from the air to make the room easer to cool. The setting for this is the drop symbol instead of the snowflake.

remote control batteries air conditioner

2. Replace or Clean the Filters

It’s important the filters are cleaned on the indoor head unit. Clogged or dirty filters, block the airflow through the unit and reduces its efficiency and ability to cool the air by up to 15%.

It also can recirculate dust and allergens into your home. Depending on the usage of your air conditioning unit, check the filters monthly and clean every 3 months or when the filters need to be cleaned. Filters can be hosed down and laid outside in the sun to dry.

replace filters

3. Check the outside condenser unit

The condensers can often get quite dirty from dust and debris gathering around the unit. Always remove debris around the condenser and ensure no plants or weeds grow around it. Low lying branches need to be at least 60cm away from the unit. The condenser fins can be cleaned using a brush, but be careful not to bend the fins or damage the coils.

remove debris around air conditioner

4. Inspect the outside condenser fins

The fins can get bent from hail damage or flying rocks when the lawn is mowed and this can block air flow through the coils and interfere with the heat exchange.

This makes the air conditioner work harder to cool the air down and reduces the system’s inefficiency. You can buy a fin comb from Super Cheap Auto which can comb and straighten the fins back to their original position.

air conditioner coils

5. Test your air conditioner

Ideally, it’s best to test your air conditioner before you rely on it by leaving it run for a while. Listen for any noises. Check air is pumped through the vents.

Summer sees an increase in air conditioner call outs because people don’t notice a problem until they need to use their air conditioner. Beat the peak call out season and test your air conditioner in spring so if it does need to be fixed, you won’t be waiting in the heat for a call out.

A new air conditioner may need to be installed if

• The system makes strange sounds as it make indicate something is loose or broken in the machine.

• Any weird smells may mean there is mould in the unit or the wire insulation may be damaged.

• The air isn’t cool or the air flow is weaker than normal, there might be a leak in the coolant.

• You notice moisture or water dripping in places it shouldn’t from the unit.

• Your unit is more than 10 years old, it’s most likely you will need to replace it. The cost of repairs can outweigh the cost or replacement. It also means you have a unit that won’t break down unexpectedly.

A little tip from me is don’t put your air conditioning unit on when the house starts to heat up. The air conditioner will draw more energy to cool the house down. Put the air conditioner on an hour before you arrive home (you can set some units with an app or timer) or put it on first thing in the morning.

Glass Free Shower Design Ideas

0
glass free shower design ideas

A glass free shower or open shower is an ideal way to remove the need for glass in the bathroom. Here are some design ideas for inspiration.

Wet room bathrooms are popular in design as they open the room making it feel bigger than it is.

This style of bathroom also removes the glass shower door and enclosure, which is one less surface to keep clean.

glass free shower design ideas

Glass free showers are one way to reduce cleaning in the bathroom.

Over time, as we all know from experience, the glass can become cloudy due to watermarks, limescale and age. Regular cleaning is necessary to keep the glass from going opaque.

The designs below have created a glass free shower in a nook or long corridor. Light and air flower should be carefully considered in this style of shower.  These nooks can be dark requiring a skylight for day and a downlight at night.

They can also echo as they imitate a cave and air flow is important to prevent mildew growth in a damp space.

Larger bathrooms can create an open shower experience in the corner, without need for glass panels but drainage design needs to be well considered for these types of open showers. A channel grate is ideal for adequate drainage.

A rain shower head works well in open showers as the water is directed down unlike a hand-held shower where water can be dispersed around.

The glass free shower design may remove the need for cleaning glass, but you may need to dry the area after use.

This shower design comes down to personal preference and the space you have allocated for your bathroom.

Here are some open showers that are glass free to inspire your next bathroom.

Glass Free Open Showers – Ideas and Inspiration

moroccan glass free shower idea
Photo by Lavare Bathrooms
shower cave glass free shower idea
Photo by Edition Office
Brilliant SA glass free shower walk in shower with glass window
Photo by Brilliant SA
Glass free shower open bathroom design to courtyard
Photo by Balay Vandyke
glass free shower design ideas
Photo by Davis Architects
open shower design glass free shower
Photo by Methven
glass free shower design idea
Photo by Crib Creative
long narrow bathroom with open walk in shower glass free
Photo by Architects EAT
glass door free shower
Photo by TCON Group
glass free shower ideas
Photo by BJF Joinery

Would you consider having a glass free shower?

How to Style a Buffet

21
How to style a buffet using flowers and plants

If you’re looking for tips on how to style a buffet, I’ve got some ideas to inspire you.

A buffet offers a blank canvas to display artwork and decor to turn your house into a home.

I love seeing what people place on their buffet as it can give insight into what the person likes – a bit like a bookshelf really.

But it can be a hard place to style as it has a limited surface and sometimes too many items on display can turn your buffet into a busy mess.

Also, if you have a love of all interior styles like I do, it can be hard to congregate them into a small space.

There are a few visual tricks you can use to get the right balance in height, depth, texture and colour when styling your buffet.

how to style a buffet

As you can see I love a lot of colour and plants. The main artwork on the left was purchased from The Block Shop. The artwork on the right was painted by Maggie when she was in Kindy.

Buffet and dining table styling

We recently updated our buffet to match our new 10 seater dining table. You can see similar items used on both buffets.

How to style a buffet using plants and flowers

Dining table and buffet styled with colour

Inspiration on how to style a buffet

Here are a few ideas on how to style a buffet or sideboard in your own home if you prefer a more neutral colour palette.

how to style a buffet in the entrance
Jessica from House of Lilley – Entrance Buffet Styling
How to style a buffet The Plumbette
Jessica from House of Lilley – Buffet Style in Living Area
Style Curataor how to style a sideboard
Photo from Style Curator – How to style a sideboard
How to style a sideboard with Katrina Chambers
Photo by Katrina Chambers – Stripping a sideboard

How to Style a Buffet

Here are some tips on styling a buffet to create a cohesive look

  • Choose a colour scheme of 2 – 3 colours.
  • Group items in 3’s which differ in height from each other.
  • Add a unique piece to sit on a 3 stack of books.
  • A tray can help keep little homewares contained and can add more interest to your look
  • Less is more. When you are finished styling, remove 1 item.
  • Layer your artwork using similar colours.
  • Choose plants and flowers which pick up hints of colour from your artwork.
  • It’s trial and error until you find the look you’re happy with.

I find it relaxing moving and swapping decor around my home as the pieces can integrate easily into other living areas with a similar colour scheme.


Styling a buffet with flowers and plants

Other Styling Posts